Friday 30 November 2012

Spicy Sausage Pizza

In an attempt to use up the merguez sausages I have, I'm finding all sorts of interesting things I can do with them. The latest offering is a sausage pizza! Instead of using peperoni or salami I slice the merguez and used them instead, the slight spiciness was delicious.


Spicy Sausage Pizza (adapted from Good Food Magazine October 2007)
(Serves 2)
(11 WW ProPoints per serving)

1 large (25cm) pizza base
2 tbsp basic tomato sauce
1/4 red onion, sliced
2 merguez sausages, cut into thin slices
1/2 tomato, sliced
1/2 ball light mozzarella
handful basil, optional

Preheat oven to 210C.

Put the pizza base onto a baking sheet and spread over the tomato sauce, leaving a border around the edge. Top with the onions, tomato, sausages and, finally, the cheese.

Cook in the oven for 10 mins until crisp. Scatter with basil, if using.

Thursday 29 November 2012

Apple and Sultana Cake

In my second foray into baking to use up my leftover flour I made cake! As I looked through my cupboards trying to find things to put in the cake that didn't mean leaving the house, I found a bag of sultanas and a cooking apple. I was really looking for a traybake recipe and that's what the original recipe is, but I didn't have enough eggs or a tin suitable for a traybake so I halved the recipe and went for Apple and Sultana Cake.

I also ended up not doing my book group that day, so I put the cake in the Staff Room at work where it was devoured by hungry teachers! It was all gone by break time and I got some lovely comments about it.


Apple and Sultana Cake (adapted from Jam and Clotted Cream)
(Serves 8-12)

112g butter, softened
140g caster sugar
2 eggs, beaten
1 tsp vanilla extract
175g self raising flour
1 tsp baking powder
handful of sultanas
1 medium bramley apple, peeled and sliced thinly

Preheat oven to 180C.

Cream the butter and sugar, beat in the eggs and vanilla and sift in the flour and baking powder and fold in until smooth. Add the sultanas and pour half the mixture into a lined baking tin.

Scatter the sliced apple on top and then cover with the remaining batter.

Bake for about 50 minutes or until golden

Wednesday 28 November 2012

Chicken Fajita Lasagne

Today is damp day. Everything from my bedroom is currently in my living room and that's where I slept last night on a pull out bed. The damp is hopefully being solved today and then it'll be a little while before painting can start and the skirting board can go back. I know when it's done it will look fantastic, that just seems a long way away at the moment!

With the second half of the jar of fajita sauce used in the Chicken Enchilada Courgette Boats made the other day, I made a Chicken Fajita Lasagne. I love using tortillas instead of lasagne sheets to create Mexican style lasagnes, it just works so well. This was delicious and really simple to make. I added in a bit more veg than the original recipe called for as it needed using up and I served it with some sour cream and chopped avocado.


Chicken Fajita Lasagne (adapted from You Big Eejit)
(Serves 1)
(17 WW ProPoints per serving)

cooking spray
2-3 chicken breasts
1/2 onion, chopped
1 cloves garlic, chopped
1 red or yellow pepper, chopped roughly
1/2 small courgette, chopped
1/2 jars fajita sauce
2 corn tortillas
grated cheese

Preheat the oven to 190C.
Spray a pan with cooking spray and fry the chicken for a couple of mins. Add in the onion, pepper and courgette and cook until soft. Add in the garlic and cook for 1 min more. Pour in 2 jars of fajita sauce, and simmer for 10 minutes.

Meanwhile get out a small lasagne dish and spray with cooking spray. Cut the tortillas in half place half a tortilla in the bottom of the dish, followed by half the chicken mixture, layer another half tortilla on top and then the rest of the chicken mixture and then the last two half tortillas on top. Sprinkle grated cheese over the top.

Bake in the oven for about 30 mins or until the top is golden and the sauce is bubbling. Serve.

Tuesday 27 November 2012

Carrot Soup with Dill and Mustard


I made this soup last weekend for the friends who helped me destroy the wardrobe. I served it with ham sandwiches and it seemed to go down well. I loved it anyway, it was nice to have a change from the more common Carrot and Coriander Soup. I am adding this to this week's Souper Sunday dreamed up by Deb at Kahakai Kitchen. I make soup almost every week so I thought why not!


Carrot Soup with Dill and Mustard (adapted from River Cottage Herbs Handbook)
(Serves 4-6)
(0 WW ProPoints per serving)

cooking spray
1 onion, peeled and sliced
500g carrots, peeled and sliced
800ml chicken or vegetable stock
15–20g bunch of dill
1 heaped tsp Dijon mustard
Sea salt and freshly ground black pepper

Heat the oil in a large saucepan over a medium heat. Add the onion and carrots. Once they start to sizzle, reduce the heat, cover the pan and sweat the veg, stirring once or twice, for 10 minutes. Add the stock. Bring to a simmer and cook for 12–15 minutes, or until the carrots are tender.

Meanwhile, cut the top quarter off the bunch of dill and set aside for serving. Discard the stalks from the remaining dill, then roughly chop the frondy leaves. Add the chopped dill to the soup and simmer for another 2 minutes only. Add the mustard, then purée the soup with a hand blender, season well with salt and pepper. Serve.

Monday 26 November 2012

Meal Planning Monday


After a hectic last week, I had a lovely weekend pottering and sorting.

I had new curtains put in my living room and a new blind in the kitchen on Saturday which seemed to take up most of my day as the guy had to physically build the track for the curtains whilst at my house. I also went down to Oxford Street on Saturday and did a bit of shopping, the whole street and Regent Street were closed off to traffic and even at 5pm it was heaving!

On Sunday I went to the Bloomsbury Ephemera Fair at the Royal National Hotel and scouted out a bit of WW2 ephemera as well as a couple of 50s and 60s cookbooks. I then spent the rest of the afternoon putting the flat back together a bit and moving things in preparation for the damp being sorted next week. It's still chaos but I'm going to have to learn to live with it as I can't put anything back for 8 weeks whilst the plaster dries!

This week should be steadier than last week and sees a french class, 2 zumba classes and a party in the evenings and then I am off to Northumberland for the weekend to buy lots of lovely Northumberland cheeses! On the way back we are stopping at the Bowes Museum and to see the Feast Your Eyes exhibition, which is all about food in art and going to the Wives and Witches: Taking Tea with the Georgians and Victorians talk by Dr Annie Gray, which I'm really looking forward to, especially as we get to sample period tea time treats! Annie did the Game Cookery afternoon that I went to a few weeks ago, which was superb, so this promises to be an interesting afternoon.

So without further ado here is this weeks meal plan:

Monday
Salmon and Avocado Rice Salad
Chicken, Spinach and Blue Cheese Pasta

Tuesday
New Potato, Pea and Ham Salad
Salmon and Prawn Bake with Pasta and Pesto (WW Fresh and Easy Everyday)

Wednesday
Soy Sesame Chicken Noodle Salad
Nigella's Mexican Lasagne

Thursday
Cajun Turkey Wrap with Sweetcorn Salsa
Sticky Glazed Gammon with Bulgar Wheat

Friday
Out at a training course
Sausages and Mash with Leeks

Saturday
Salami Pasta Salad
Away for rest of the weekend

Check out At Home with Mrs M for some more helpful Meal Plan ideas.

Chinese Prawns and Broccoli

This was a very quick and easy dinner. I miss eating lots of Chinese and Japanese food but for whatever reason I seem to have stopped. Given that I'm still aiming at a healthy diet and stir fries and Japanese food are some of the healthiest meals around that's a bit odd., but hey other things have taken over. I will definitely have to start again as I love the freshness of the veggies with fish or meat and this ticked all the right boxes.


Chinese Prawn and Broccoli (adapted from WW Cooking for One)
(Serves 1)
(8 WW ProPoints per serving)

1 tsp cornflour
pinch of cayenne pepper
1 tbsp soy sauce
100g raw peeled prawns
cooking spray
1 garlic clove, chopped
1 tsp grated fresh ginger
100g tenderstem broccoli, trimmed
50g mushrooms, sliced
2 tbsp shaoxing rice wine
1 spring onion, sliced finely at an angle

Mix together the cornflour and cayenne pepper. Add the soy sauce and mix well. Add the prawns and mix again. Set aside in the fridge to marinade for 30 mins.

Heat a non stick frying pan or wok until hot then spray with the cooking spray. Add the garlic and ginger and cook for a second before adding the broccoli and mushrooms. Stir fry over a high heat for about a minute.

Add the rice wine, then the prawns and 5 tbsp of water. Bring to the boil and simmer for 2-3 mins until the prawns turn pink. Simmer for a further 1-2 mins, then add half the spring onion. Cook for 1 min.

Sprinkle over the remaining spring onion and serve over 50g rice for an extra 5 WW ProPoints.

Sunday 25 November 2012

Tuna Rice Salad

This morning I went to an ephemera fair near Russell Square. I bought a couple of 1950/60s cookery books and some World War 2 stuff. I love rifling through the boxes of stuff and seeing what I can find. I have a collection of World War 2 home front ephemera and I'm starting to buy more and more cookery books and pamphlets from the 50s and 60s, I love the colourful covers and the fantastic advice inside.

This salad feels like a bit of a throw back, its really easy to make and tasty and filling. A brilliant lunch to take to work.


Tuna Rice Salad (adapted from Good Food Magazine August 2010)
(Serves 1)
(10 WW ProPoints per serving)

1/2 120g tin tuna
50g white rice
1/2 red pepper, chopped
1 tomato, cut into small chunks
1 tbsp peas
1 spring onion, sliced
1 tsp parsley, chopped
3-4 large green, stoned and chopped
1 tbsp mayonnaise
1 tbsp lemon juice
1 tsp olive oil

Cook the rice according to packet instructions, add the peas for the last 4 mins, drain and then run under cold water. Put into a bowl.

Flake in the tuna, then mix in the peas, peppers, tomatoes, spring onions, parsley and olives, if you're using them.

Stir through the mayonnaise, lemon juice and olive oil and season to taste.

Saturday 24 November 2012

Chicken Enchilada Courgette Boats

I have shiny new curtains and a shiny new blind in the kitchen. It looks so good now it's in and finishes of the kitchen, only a year after it was completely redone!! I love the different styles of plate of blue plates!

Photo: Has a shiny new blind!


Needless to say the flat was in even more chaos than usual today but Smudge and I got through it and things are slowly getting back to normal. Well I say that, but half my living room is still functioning as my wardrobe and will be for the next 9 weeks or so whilst the damp is sorted and then the plaster dries, it will be so good when it's finished.

This is a Mexican inspired dish and if I'd managed to grow a courgette the right size would have been made over the summer but every time I left the courgettes to grow they turned into enormous marrows seemingly overnight! So I had to buy a larger one from the supermarket and use that. This was delicious and less watery than one would imagine. I served it with sour cream and a chopped baby avocado.


Chicken Enchilada Courgette Boats (adapted from Closet Cooking)
(Serves 2)
(9 WW ProPoints per serving)

4 medium courgettes, cut in half lengthwise
1 tbsp oil
1 small onion, chopped
2 cloves garlic, chopped
1 tsp ground cumin
1 tbsp chili powder or to taste
1 chicken breast, cooked and shredded
2 heaped tbsp sweetcorn
1 teaspoon oregano
1/2 jar enchilada sauce
1 tbsp coriander, chopped

Place the courgette halves in boiling water for a minute, remove and let cool. Hollow out the courgette halves with a small spoon reserving the removed flesh.

Heat the oil in a pan over medium heat. Add the onion and saute until tender, about 5-7 minutes.Add the garlic, cumin and chili powder and saute until fragrant, about a minute.

Add the reserved courgette flesh, chicken, corn, oregano, 3/4 the fajita sauce and cilantro, cook for a few minutes and remove from heat.

Spread 1/4 of the fajita sauce over the bottom of a large baking dish, place the zucchini in the dish, stuff them with the filling and top with the cheese.

Bake in a preheated 190C oven until the courgettes i is nice and tender and the cheese has melted, about 30-40 minutes.

Friday 23 November 2012

Sesame and Ginger Coleslaw

I love the fresh taste of coleslaw and I love playing around with the traditional recipes and looking for new twists on this dish. I made an Asian style coleslaw back in June for my birthday barbecue, without mayonnaise. This time I made an Asian style coleslaw with the mayo. I like the combination of both sour cream and mayo rather than all mayo as I feel that it lightens the dish up. This was fantastic in a smoked sausage and coleslaw sandwich.


Sesame and Ginger Coleslaw (adapted from Closet Cooking)
(makes 8 sandwich filling servings)
(1WW ProPoint per serving)

1/2 small cabbage, shredded
1 carrot, shredded
bunch spring onion
3 1/2 tbsp reduced fat mayonnaise
3 1/2 tbsp reduced fat sour cream or creme fraiche
2 tbsp rice wine vinegar
1 tbsp honey
1 tsp ginger, grated
1 tsp toasted sesame oil
1 tbsp sesame seeds
salt and pepper to taste
1 handful coriander, chopped

Mix the mayo, sour cream, rice wine vinegar, honey, ginger, toasted sesame oil, sesame seeds, salt, pepper and coriander in a bowl.

Add the cabbage, carrot and spring onion to the bowl and mix well to combine.

Thursday 22 November 2012

Spicy Sausage and Bean Salad

So far this week has proved exceedingly stressful and nasty, but I keep on going and tomorrow I am on a course in Brighton, which should hopefully be interesting and useful. It's nice to go through the photos of things I've eaten in the past couple of weeks and come across one that is so colourful and vibrant. This sausage and bean salad is an adaptation of a recipe in the WeghtWatchers Nice n Spicy book. The original recipe used normal sausages and chilli but I decided to use a spicy sausage instead and leave out the chilli. I also roasted my onions rather than leaving them raw.

Merguez sausages are fantastic, lovely and spicy and they remind me of getting back from summer holidays to France when I was younger. We always had these and bratwurst as our dinner when we arrived back as they require little effort on my Mum's part with all the unpacking that needed to be done. Also at that time I suspect that neither of these sausages was available here in the UK, Merguez is a North African sausage and Bratwurst traditionally German, so they were a real treat. Both still aren't really widely available, but I can't recommend them highly enough, especially the merguez if you like spicy and bratwurst if you like a meaty sausage.


Spicy Sausage and Bean Salad (adapted from WeightWatchers Nice N Spicy)
(Serves 4)
(9 WW ProPoints per serving)

8 merguez sausages
1 small red onion, quartered and halved again
4 ripe tomatoes, quartered and halved again
2 x 400g cans cannellini beans, drained and rinsed
small bunch of fresh parsley, basil or coriander, chopped
salt and pepper

for the dressing
2 tbsp balsamic vinegar
4 tsp olive oil
1 tsp tabasco sauce
1 tbsp Worcestershire sauce

Preheat the oven to 200C and bake the sausage for 30 mins and the onions for

Meanwhile, place all the dressing ingredients in a clean screw top jar and shake until mixed. Place the onions, tomatoes, beans and herbs in a bowl and season. Pour over the dressing.

Chop the sausage into small pieces, add to the salad and toss everything together. Leave to marinate for as long as possible before serving.

Wednesday 21 November 2012

Chocolate and Sultana Cookies

On a Tuesday lunchtime I run a book club for pupils aged 11-14. This is usually a crazy affair with lots of food and up to 60 girls coming. I have a lot of leftover flour that needs using before it goes out of date and I thought the perfect way to use it but not eat the cakes or biscuits was to bring them to school for the book club. They always appreciate something homebaked.

The first thing I made were these delicious cookies. The original recipe uses hazelnuts but I can't take them to school because of nut allergies, so I swapped them for sultanas. The cookies were really good, fudgy in the middle and the combination of sultanas and chocolate went down well with the pupils. They were all gone in a matter of minutes.


Chocolate Chip and Sultana Cookies (adapted from Leiths Simple Cookery)
(Makes about 20)

110g butter
110g caster sugar
1 egg, beaten
170g plain flour, sifted
pinch of salt
1/2 tsp vanilla extract
110g chocolate chips
60g sultanas

Preheat the oven to 180C and line a baking sheet with greaseproof paper.

In a large bowl, cream the butter until soft, add the sugar and beat again until pale and fluffy. Beat in the egg, the flour, salt, vanilla extract, chocolate and sultanas. Don't over stir.

Place large teaspoonfuls of the mixture on the baking sheet, leaving room for the cookies to spread and bake in the oven for 12-15mins or until golden brown and cooked through. Transfer to a wire rack and leave to cool completely.

Tuesday 20 November 2012

Broad Bean and Mint Soup

This is a very tasty soup. It seemed a bit better after being put in the fridge for a couple of days. The flavours seem to come together better. It went really well with a ham and mustard sandwich.


Broad Bean and Mint Soup (from www.weightwatchers.co.uk)
(Serves 4)
(3 WW ProPoints per serving)

cooking spray
6 spring onions, chopped
2 tbsp mint, chopped
350g broad beans
600ml vegetable stock
150ml skimmed milk

Heat the low fat cooking spray in a large saucepan, add the onions and cook for 2-3 minutes until just softened. Add the beans and stock. Bring to the boil, cover and simmer for 10 minutes.

Stir in the milk and mint and blend with a hand blender until smooth. Cook for 2-3 minutes until piping hot. Season and serve.

Monday 19 November 2012

Meal Plan Monday


I have a funny feeling about this meal plan. I suspect that it's going to be changed around quite a lot. This week is ridiculously hectic, I seem to be running around all over the place. I, with the help of some friends, took the semi fitted wardrobe out of my bedroom on Saturday and discovered a large amount of damp and mould! So I have a man coming to look at that on Wednesday.  Half of my living room now looks like a dressing room with clothes and suitcases everywhere! I am also off on a visit to another school tomorrow and off to Brighton for a training course on Friday as well as teaching 8 lessons, standing up in Middle School assembly to present prizes (eek) and trying to do everything else that needs doing at work. Then I have 3 lots of zumba, a French lesson in the evenings as normal and a man coming to fit curtains on Saturday morning and to top it off I have a cold!

So the meals are quick and easy and mostly made before hand and then pulled out the freezer. I am really looking forward to the Smoked Haddock and Spinach Risotto and also the Cheesy Veggie Pasta Bake which promises to be low fat and cheesy!

Monday
Spicy Sausage Pizza
Lime Pork Curry and Rice (WW Nice n Spicy)

Tuesday
Veal, Caramelised Onion, Mushroom and Spinach Bulgar Pilaf
Chicken Burger

Wednesday
California Roll Salad
Spaghetti Squash Lasagne

Thursday
Roasted Veg and Goat's Cheese Pitta
Smoked Haddock and Spinach Risotto (Leiths Simple Cookery)

Friday
Out at a course
Out with friends

Saturday
Cheesy Veggie Pasta Bake

Sunday
Chicken, Spinach and Blue Cheese Pasta

Check out At Home with Mrs M for more meal ideas

Honey Mustard Chicken Pasta Salad

This is a fantastically easy lunch box pasta salad, tasty too!


Honey Mustard Chicken Pasta Salad (adapted from Good Food Magazine August 2008)
(Serves 4)
(11 WW ProPoints per serving)

300g farfalle or other pasta shapes
3 tbsp reduced-fat mayonnaise
1 tbsp honey mustard sauce
2 cooked chicken breasts, torn into rough pieces
4 spring onions, thinly sliced
small bunch basil, leaves roughly torn
4 tomatoes, quartered, then each chunk halved

Boil the pasta, then cool under running water.  

Mix the mayo and honey mustard sauce in a large bowl and loosen with a little water to make a dressing the consistency of double cream.  

Add the pasta, chicken, onions, basil and tomatoes, season to taste, then gently mix together. Serve.

Sunday 18 November 2012

Smoky Lamb Stew

This is a hearty and smoky stew and it is absolutely delicious. The original recipe calls for beef rather than lamb, but the lamb works just as well. I served it with toasted pitta, but any crusty bread would do and you could use feta instead of cheddar on top.


Smoky Lamb Stew (adapted from Good Food Magazine September 2010)
(Serves 4 hearty portions)
(15 WW ProPoints per serving without the cheese or bread)

cooking spray
1kg shoulder of lamb, cut into large chunks
1 onion, chopped
2 cans chopped tomatoes
2 tsp smoked paprika,
2 tsp ground cumin
2 tsp mild chilli powder
2 tbsp red or white wine vinegar
1 tsp caster sugar
400g can butter beans, rinsed and drained
100g cheddar, grated

Heat oven to 160C. Heat a stove top and oven proof casserole dish and spray with cooking spray. Brown the lamb briefly and set aside. Spray again with cooking spray and add the onions, fry until translucent.

Add in the tomatoes, spices, vinegar and sugar and fill one of the tomato cans with water and add to the pan, bring to the boil and cover and bake for 2½ hrs. Stir in the beans and bake for 30 mins more (with the lid off if the casserole is a little wet or lid on if good consistency), until the lamb is tender.

Serve topped with grated cheese, you can miss out the cheese if you want a lower fat version. Serve with pitta or crusty bread.

Saturday 17 November 2012

Soba Noodles with Ham and Edamame

Today I am busy destroying a wardrobe! It has to come out before they can even test for damp in the wall and I am likely to be living in clothes chaos for the next few months as everything gets dumped in the living room!

This is a very simple but creative noodle salad, using Japanese elements but adding in the ham. It was a quick and easy noodle salad that I had for dinner one evening last week, whilst sat on the tube.


Soba Noodles with Ham and Edamame
(Serves 1)
(10 WW ProPoints per serving)

50g soba noodles
2 tbsp edamame, cut into thin slices
2 slices of ham
1 tbsp soy sauce
1 tbsp rice wine vinegar
1 tbsp mirin
1 tbsp miso paste
1 tsp wasabi paste

Bring a pan of water to the boil and cook the soba noodles according to packet instructions, usually about 4-5 mins. Cook the edamame in the same pan for the same length of time. Drain and rinse with cold water and set aside.

Mix together the soy sauce, vinegar, mirin, miso and wasabi in a bowl. Toss the noodles in the sauce and top with the edamame and ham.

Friday 16 November 2012

Nigella's Asian Braised Shin of Beef with Hot and Sour Shredded Salad

This was a casserole with a difference. It has beautiful Asian flavours in it and a cut of meat I had never cooked with before and the glorious sour shredded salad on top, which just went perfectly with the stew. If you make this, you have to make the salad too, it's just not right without it. I did take a lot of the fat off the shin of beef but as it's going to be cooked for ages I left some of it on to add extra flavour to the meat. I served it on a bed of egg noodles. Nigella suggests parsnip and ginger mash which I'm going to try with my leftovers.


Asian Braised Shin of Beef (from Nigella Kitchen)
(Serves 6)
(9 WW ProPoints per serving)

2 onions
1 5cm piece ginger
4 garlic cloves
2 tsp ground coriander
3 tbsp veg oil
250ml Chinese cooking wine or dry sherry
4 tbsp soy sauce
4 tbsp dark brown sugar
2l beef stock
2 tbsp oyster sauce
4 tbsp rice wine vinegar
2 cinnamon sticks
2 star anise
3.5kg beef shin on the bone or 1kg off the bone

Preheat the oven to 150C. Quarter and peel the onions, peel and roughly slice the ginger, peel the garlic cloves and put all these in a food processor with the coriander. Blitz until finely chopped.

Heat the oil in a large casserole and fry this mixture gently, until soft and beginning to catch in the pan; this should take about 10 mins, over a medium heat with regular stirring.

Pour in the Chinese wine and let it bubble up. Add the soy sauce, brown sugar, stock, oyster sauce and vinegar. Bring to a boil, then drop in the cinnamon sticks and star anise.

Add the pieces of shin and let everything come up to a bubble again, then clamp on a lid and put into the oven for 2 hours.

Take the casserole out of the oven and using a slotted spoon, remove the beef to an ovenproof dish, cover with foil and keep warm in the oven, while you vigorously boil the sauce in a casserole on the hob, without a lid, until it has reduced by about a half.

Arrange the beef in a serving platter and pour over the reduced sauce, then dress the top with the hot and sour shredded salad (underneath).

Hot and Sour Shredded Salad
(Serves 6)

3 carrots
4 spring onions
1/2 cucumber
1 long red chilli
1 long green chilli
small bunch coriander

for the dressing
juice 1 lime
4 tbsp Thai fish sauce
1 tsp caster sugar

Peel the carrots, cut into batons and then julienne them, do the same with the cucumber.

Trim and halve the spring onions and julienne as well.

De-seed the chillies and cut into juliennes, then finely chop the coriander.

Combine all the vegetables and the chopped coriander in a bowl. In another bowl mix the lime juice, fish sauce and sugar together and dress the veg with this, then top the Asian Braised Shin of Beef with your salad.

Thursday 15 November 2012

Curried Tuna Sandwich Filling

I think I have said before that I am not a huge fan of tinned tuna, however I have recently discovered its usefulness and delights! I still don't think I could eat a tuna mayonnaise sandwich, I need a bit more flavour than that. But it is a useful and fairly cheap and filling food. This tuna sandwich was really good. I used a Warburton's sandwich thin as the bread part and added some cucumber the the sandwich. Filling and tasty!


Curried Tuna Sandwich Filling (adapted from allrecipes)
(Serves 4)
(6 WW ProPoints per serving)

2 cans water packed tuna, drained and flaked
2 tsp mayonnaise
1 tsp Dijon mustard
1 tbsp mango chutney
2 tsp lemon juice
1 1/2 tsp ground cinnamon
1 tsp curry powder
salt and pepper

In a bowl, mix the tuna, mayonnaise, mustard, relish, lemon juice, cinnamon, curry powder, pepper, and salt.

Cover, and refrigerate until ready to serve.

Wednesday 14 November 2012

Daring Cooks November 2012: Brining

Audax of Audax Artifax was our November 2012 Daring Cooks’ host. Audax has brought us into the world of brining and roasting, where we brined meat and vegetables and roasted them afterwards for a delicious meal!

I apparently cannot read instructions this month. Generally I think the brining process is used for poultry, I had only previously heard of it in connection with turkeys on Thanksgiving. However, as I was going to do this challenge just for me, I didn't want to go down the chicken route, so I chose fish. Specifically I chose gurnard, a sustainable white fish, which has been championed by Hugh Fearley-Whittingstall and others as a sustainable alternative to cod and haddock. Its a very ugly fish but it is incredibly tasty, much better than the pasty coley or hoki. However, when I actually read through what I had to do, after buying the fish, it said "ITEMS THAT BENEFIT FROM BRINING - Seafood: salmon, trout, shrimp" nothing about white fish!

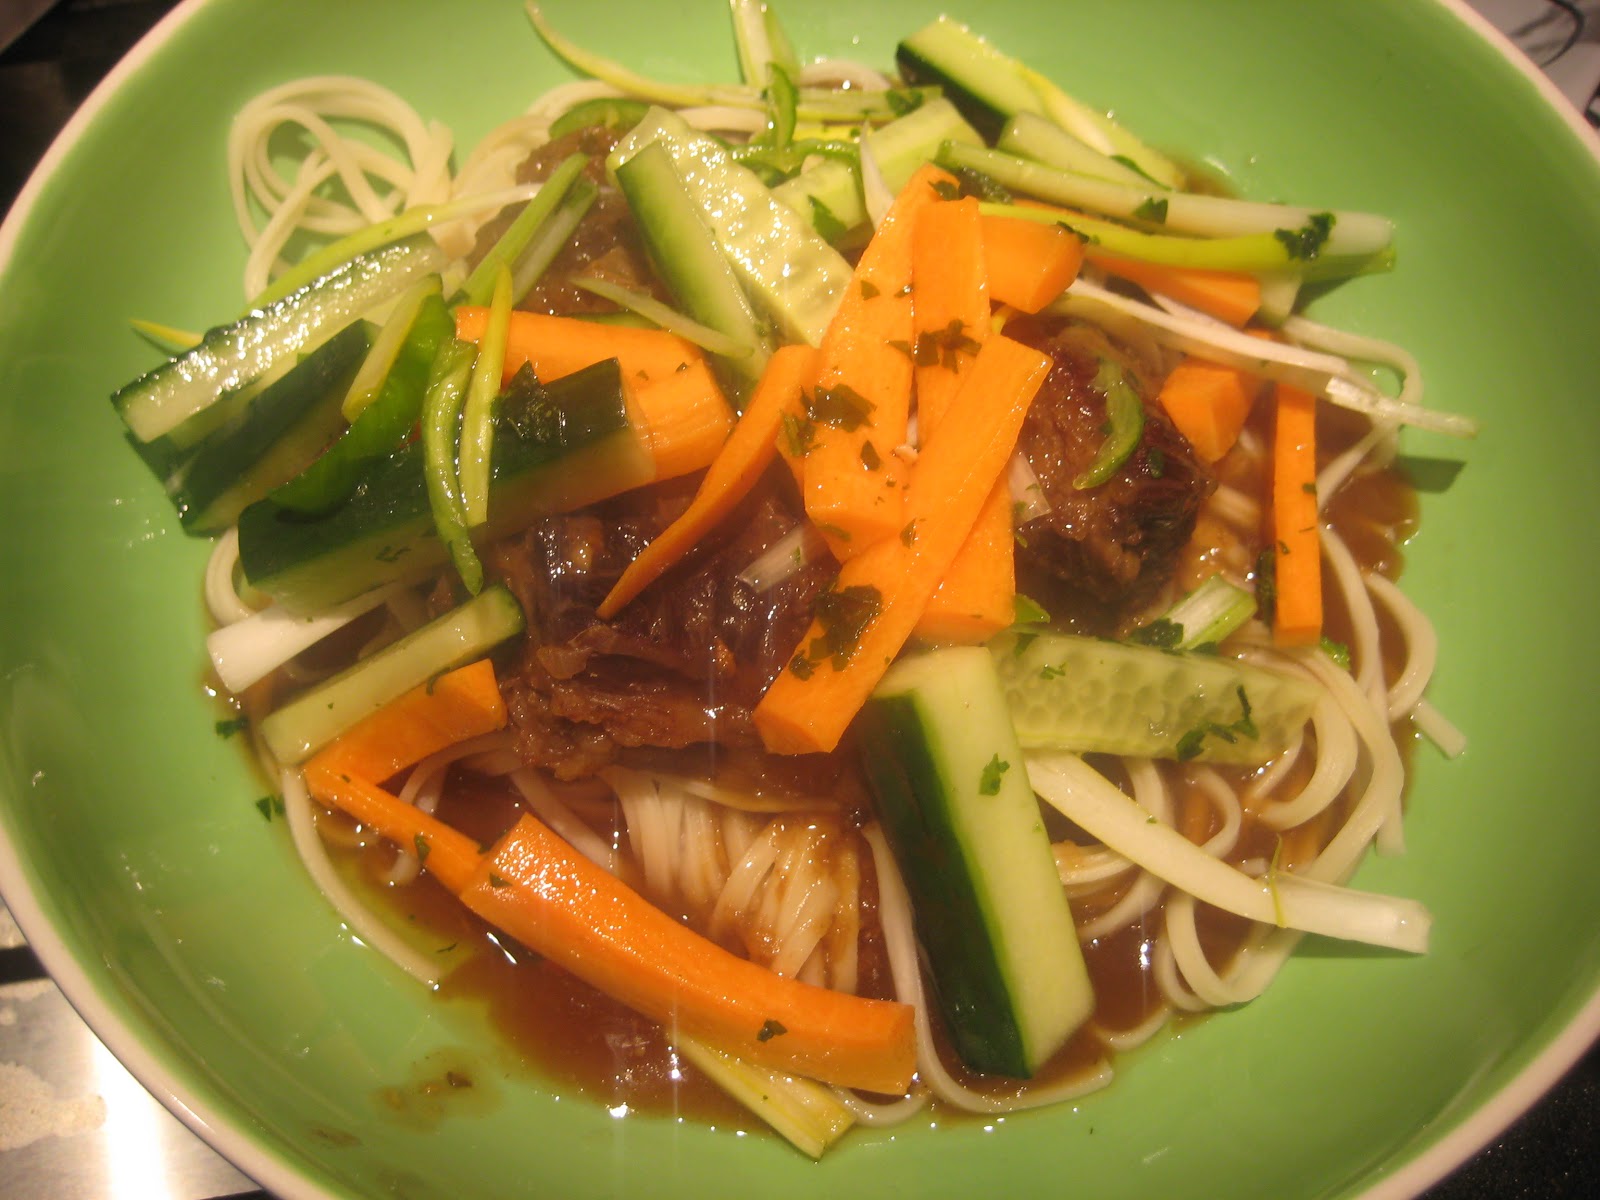
So I hummed and hawed and asked Audax and he said go for it anyway and I did and boy am I glad I did. This was the tastiest fish ever. The brining really brought out the flavour of the fish. I used the recipe below for brining the gurnard and I left it for about 5 hours in the fridge, then I roasted it with carrots, peppers and onions for 25 mins and served it with potato and leek mash and coleslaw. So so good.


Recipe One – All-Purpose Brine:
Makes 4 cups of brine enough for about one pound (½ kg) of meat
This is the brine to use for most cuts of meat and poultry that will be roasted.

Ingredients
4 cups (1 litre) of cold water (see note 1)
¼ cup (70 gm) table salt or ½ cup (70 gm) Diamond Crystal Kosher Salt
optional 2 tablespoons (30 ml) (30 gm/1 oz) sugar (see note 2)
optional 3-4 peppercorns, a few springs of herbs, a garlic clove or two, a knob of ginger etc. (see note 3)

Instructions

1. Heat 1 cup of water to boiling point add the salt and stir until all the salt has totally dissolved.

2. Place in a non-reactive container (glass, plastic, stainless steel, zip-lock bags etc). Add the remaining water and stir. Make sure that all the salt has dissolved. Wait until the brine has reached room temperature.

3. Add your cut of meat make sure that the meat is completely submerged (that is totally covered in the salty water) if need be you can weigh down the cut of meat with a clean plate (etc). If using plastic bags make sure that the meat is totally covered in brine and make sure that is bag is locked securely.


4. Cover the container with plastic wrap to prevent odours contaminating the flavour brine or the brine leaking.

5. Place the container into the refrigerator for the soaking time suggested by the guidelines above.

6. If desired you can air-dry your poultry (usually over night) in the refrigerator if you wish to have crispy skin on your bird. It is best to pat dry your brined item (inside and out) with paper towels before cooking.


Notes
1. You can replace all or some of the water with a combination of wine, cider, beer, tea, coffee, fruit juice, most sauces (tomato, soya, BBQ, chilli etc), chicken stock, beef stock or fish stock. Be careful with acidic liquids like wine, cider, fruit juices which can turn your meat to mush if brined too long.

2. A little sugar can help overcome the saltiness of the brine and helps to give a nice sheen to your piece of meat when roasted. You can use up to ¼ cup of sugar (use the lesser amount (2 tablespoons) for high temperature roasting since the brine can burn at high heats if you use too much sugar). You can use brown sugar or honey or other sweeteners if you wish.

3. Any combination of spices and herbs can be used to flavour the brine. Garlic powder, onion powder and ginger powder are excellent to use for brining.


Tuesday 13 November 2012

Spanish Chicken with Rice

I feel very sleepy today. I did an hour and half extra at work yesterday as a talk I was doing over ran and then at midnight the cat brought a mouse into the bedroom. I hate mice. They make me shudder so I just have to leave her to get on with it.


She looks very cute when she's hiding behind the throw on the sofa but not when there is a mouse on my bedroom floor! I hate that black leather sofa but it's too big to get out of my house and the thought of having to break it up to move it is just beyond me at the moment!

This is the recipe for the rice bit of the lunch I posted yesterday. I originally had it as a nice paellaesque dish all done in my slow cooker, which doesn't get used very often. But this worked fantastically so I might have to use it some more, browning the meat first of course! I love the summery flavours of this dish and sticky rice dishes, risotto, paella etc. always feel comforting and lovely and luxurious to eat.


Spanish Chicken with Rice (from WeightWatchers Magazine December 2012)
(Serves 4)
(11 WW ProPoints per serving)

200g paella rice
1 red onion, chopped
3 garlic cloves, sliced
1 red and 1 yellow pepper, deseeded and chopped
300ml chicken stock
pinch of saffron threads
110g chorizo, sliced into rounds
4 skinless, boneless chicken breasts
60g pitted black olives
2 tbsp parsley, chopped

Combine the rice, onion, garlic and pepper in the base of the slow cooker. Make up the chicken stock and add the saffron threads.

Put the chorizo slices in a frying pan and heat. Fry, turning once, until the chorizo has changed colour and released its oil. Remove the chorizo and transfer it to the slow cooker. Stir into the rice mixture, then pour over the saffron scented chicken stock.

Add the chicken breasts to the frying pan. Sear for about 8 mins, turning once, then place on top of the rice, cover and cook on high for about 1 1/2- 2 hours or on low for about 2 1/2 - 3 hours, stirring the rice gently half way through, until the rice and chicken are both tender and cooked through.

Lift the chicken breasts out and stir in the olives and most of the parsley. Serve the rice with a chicken breast on top, scattered with parsley.


Monday 12 November 2012

Meal Planning Monday and Spanish Chicken and Rice Salad

I thought I'd share with you one of my lunches from last week, which doesn't really warrant a whole post by itself. I was looking at the salad in Marks and Spencer for inspiration over half term and came across a Spanish Style Chicken with Rice Salad with Sherry Vinaigrette. It looked delicious but expensive and I reckoned I could make it myself. So I did! It is a little bit different but the basic principles are there.

I marinated my chicken breast in half a tsp each of sweet, hot and smoked paprika and a tsp of oil and then I baked it for 30 mins. The rice is leftovers of a Spanish rice dish I made the night before (recipe to follow). I mixed some butter beans and pepperdew peppers together to make a little salad and then added the rocket to the box. I also made a sherry vinaigrette to pour over the salad, using sherry vinegar, olive oil and smoked paprika. Delicious!


This weeks meal plan is varied and uses lots of Internet recipes. I struggled to think of things to make for lunch as always, I like variety but it's hard to think of ideas! I'm also really busy this week with french class, zumba, going out and a training course this necessitates quick and easy meals trying to finish some of the stuff in my fridge.

Monday
Honey Mustard Chicken Pasta Salad
Sweet Potato and Smoked Haddock Pie

Tuesday
Broad Bean and Mint Soup with a Ham and Mustard Sandwich
Out either at Mishkins or MEATmarket

Wednesday
Tuna Rice Salad
Broccoli and Blue Cheese Pasta

Thursday
Smoked Sausage and Coleslaw Sandwich and Crisps
Chicken Enchilada Courgette Boats, Bread and Butter Pudding

Friday
Spicy Crab Noodle Salad
Prawn and Broccoli Stir Fry (WW Cooking for One)

Saturday
Chicken Fajita Lasagne

Sunday
Spicy Sausage Pizza

Don't forget to check out Mrs M's blog for more meal ideas.

Vegetarian Mulligatawny Soup

I was looking for a slightly heartier soup as my points allowance went up, rather than the 1 or 2 point soups I'd been making before. Plus as we head into winter hearty soups are definitely called for and I love the idea of an Indian soup, so I made this mulligatawny. I think the meat version has lamb in it, which seemes to me a bit weird in soup, so I plumped for a veggie version with chickpeas and lentils. The original, orginal recipe is a Madhur Jaffrey one and as she is the authority on Indian cookery in the UK you can't go wrong with it.


Mulligatawny Soup (adapted from Cookbook Cooks)
(Serves 4)
(7 WW ProPoints per serving)

cooking spray
1 onion, chopped
1 tsp ginger grated
1 tsp garlic, crushed
1 tsp ground cumin
1 tsp ground coriander
1 1/2 tsp Madras curry powder
1/8-1/4 tsp cayenne pepper
400g can chickpeas, drained
200g split red lentils
1l veg stock
salt
1 tbsp lemon juice
1 tbsp fresh coriander, chopped

Heat the pan and spray with cooking spray. Add the onion and fry for a few mins until translucent, add the garlic and ginger and cook for 1 more min. Add the cumin, coriander, curry powder and cayenne and stir for 1 min more.

Add the chickpeas and stir to coat with the spices. Add the lentils, veg stock and season with salt. Bring to the boil, reduce the heat and simmer for 45 mins.

Remove from the heat and spoon out about a third of the mixture. Blend the rest with a hand blender and then return the unmeushed stuff to the pan. Stir in the lemon juice and sprinkle over the coriander. Serve.

Sunday 11 November 2012

Pesto Pizzas

I made this pizza ages ago for my sister and friend and it was a huge hit, but of course I forgot to take a photo! This one I made using a ready made pizza base which was nowhere near as good, but the flavours were delicious. I swapped the Gorgonzola for dolcelate on the second go too as I found that Gorgonzola doesn't taste of anything once cooked.

 
Pesto Pizzas (from Leiths Simple Cookery)
(Makes 1 large or 2 small pizzas)
(13 WW ProPoints per serving)

1 145g packet of pizza mix
3 tbsp pesto
85g sun dried tomatoes in oil, drained and chopped
60g Gorgonzola cheese
60g light mozzarella cheese
3 slices parma ham
handful rocket

Preheat the oven to 220C.

Make up the pizza dough following the instructions on the packet. If making more than 1 pizza divide the dough into 2. Roll the dough into a circle, place on a non stick baking sheet and leave to rise in a warm place for 20 mins.

Layer the tomatoes and cheeses over the top and cover loosely with the ham. Drizzle over a little of the tomato oil and season with pepper.


Bake in the oven for 15- 20 mins.

Remove the pizzas from the oven and place a large handful of rocket on top of the pizza. Serve.

Saturday 10 November 2012

Falafel and Halloumi Burger

These falafel burgers are beautifully tangy with the saltiness of the halloumi. The recipes suggests serving them with houmous, lettuce and pickled chillies, I went for homemade tzatziki, rocket and dill pickles, mostly because that's what I had and it still tasted delicious. I was using it as a way to use up half a can of chickpeas that I'd opened for something else, so really didn't want to go out and buy anything new and I still managed to keep with a Greek theme!


Falafel and Halloumi Burgers (adapted from Olive Magazine August 2009)
(Serves 6)
(11 ProPoints per serving)

2 x 400g cans chickpeas, drained
2 tsp ground cumin
1 tsp ground coriander
2 green chillies, chopped
2 garlic cloves
½ a small bunch spring onions
1 tsp salt flakes
2 tbsp plain flour
250g halloumi cheese, diced

To serve
pitta bread
tzatziki
rocket
pickles

Preheat the oven to 190C.

Put the first 9 ingredients in a food processor and whizz until broken down. Tip into a bowl, mix in the halloumi, and form into 6 burgers.

Lay the burgers out on a baking sheet and bake in the oven for 30 mins.


Serve in grilled pittas with houmous, lettuce and pickles.

Friday 9 November 2012

Chicken Tagine with Lemon Couscous

I'm not quite sure why this is in the Nice N Spicy book as it's not really spicy but it is very flavourful.


Chicken Tagine with Lemon Couscous (from WeightWatchers Nice n Spicy)
(Serves 2)
(10 WW ProPoints per serving)

cooking spray
2 chicken breasts
1 red pepper, deseeded and sliced
1 onion, chopped
2 garlic cloves, crushed
1 tsp ground cinnamon
1 tsp ground cumin
1/2 tsp turmeric
2 tomatoes, chopped
250ml chicken stock
400g can apricots in natural juice, drained and sliced
2 tbsp fresh coriander to garnish

For the couscous
125g couscous
150g chicken stock or water
75g steamed green beans, chopped into 1 inch pieces
grated zest and juice of 1 lemon
salt and pepper

Spray a lidded frying pan with cooking spray and heat until hot. Add the chicken breasts and cook for 3 mins turning once, until browned on both sides. Remove from the pan.

Spray the pan again with the cooking spray and add the pepper and onion. Stir fry for 5 mins until just tender. Add the garlic and spices and continue cooking for 1 min. Return the chicken to the pan with the tomatoes and stock. Cover and simmer over a low heat for 15 mins. Add the apricots and cook for another 5 mins until the chicken is tender.

Meanwhile, to prepare the couscous, place it in a bowl, pour over the hot stock and cover with clingfilm. Set aside to soak for 10 mins. Fluff with a fork, stir in the beans and lemon zest and juice, then season.

Serve the chicken tagine with a pile of the couscous, scattered with the coriander.

Thursday 8 November 2012

Lemon and Rocket Risotto with Dill Mustard Salmon

This risotto was absolutely delicious. I made two portions as it's easier to make risotto for more than one person and froze the leftovers. I'm going to have them tomorrow with some scallops with Old Bay seasoning. It would be nice with pretty much any fish or chicken, it's a very basic risotto recipe but lovely and lemony.

In the original recipe the salmon is marinated in honey but I had some of that mustard dill sauce that you eat with gravadlax and used that instead, so if you don't have that, use the same amount of honey.


Lemon and Rocket Risotto with Dill Mustard Salmon (adapted from Leiths Simple Cookery)
(Serves 4)

450g salmon fillet, skinned and cut into strips
2 tbsp dill mustard sauce
cooking spray
1 medium onion, chopped
1 clove garlic, crushed
240g risotto rice
1 glass dry white wine
1l hot fish or chicken stock
grated zest 2 lemons
60g Parmesan, grated
60g rocket
juice of 1 lemon
salt and pepper

Toss the salmon the dill mustard sauce and a little pepper.

Heat a large pan and spray with cooking spray, add the onion and sweat until translucent. Add the garlic and cook for 1 min more, then add the rice and stir. Add the wine.

Stir in the stock and place in the oven for 25 mins.

Take out of the oven and add the lemon zest, stir and leave for 1 min. Then stir in the Parmesan, salt and pepper to taste and add the rocket, reserving a few leaves for garnish. Cover and leave to rest for 3 mins.

Meanwhile, heat the remaining oil in a frying pan, add the pieces of salmon and cook for about 1 min on each side.

Stir the lemon juice into the risotto and divide between 4 bowls, place the salmon on top. Garnish with the reserved rocket leaves. Serve.

Wednesday 7 November 2012

Ginger Miso Carrot Soup

This is an interesting twist on either carrot soup or miso soup. The original recipe doesn't have ginger in it but I thought that it would be a good addition and you do get a hint of ginger with every mouthful. It was a lovely warming soup.


Ginger Miso Carrot Soup (adapted from More Than Words)
(Serves 6)
(1 WW ProPoint per serving)

2 red onions chopped
1 tbsp ginger, grated
1.5 kg of carrots, chopped
1 bunch of celery, chopped
2 tablespoon of miso paste
2 litres of chicken stock

Saute red onions and cook till soft, add in the ginger and cook for 1 min more. Add the carrots and celery, stir and then add the chicken stock.

Cook for about 30 mins until the carrots are soft and then blend the soup.

Return to the pot and add the miso paste. Season and serve.

Tuesday 6 November 2012

Nigella's Japanese Prawns

Easily one of the most versatile dishes I have made in a long time, as Nigella says you can serve it over salad for a light lunch or over noodles or rice for a heartier supper.

I went for the salad option as I wanted something for lunch and you really do need to use iceberg lettuce, any other sort of lettuce will wilt and go that yucky khaki colour when the hot sauce is poured over. It doesn't say that in the book, I have taken to sky plussing episodes of TV shows where I have the book to pick up handy hints like that and also which recipes are best served with each other, this is especially true with Nigella Kitchen and Nigella Express where the recipes put together in the book are different from the TV show and give me more options!


Japanese Prawns (from Nigella Kitchen)
(Serves 2)
(3 WW ProPoints if served with lettuce)

2 tbsp water
2 tbsp sake
1/2 tsp sea salt flakes
1 tbsp lime juice
1 tsp wasabi paste
2 tsp garlic oil
2 spring onions, finely sliced
200g raw king prawns, frozen
iceberg lettuce, rice or noodles to serve

In a bowl mix together the water, sake, salt, lime juice and wasabi.

Heat a wok or deep frying pan and, when warm, add the garlic oil and spring onions and stir fry for a min or so, then tip in the frozen prawns and cook for about 3 mins.

Add the liquid mixture to the pan, bring to a bubble and cook for another 2 mins, stirring the prawns about a bit in the sauce.

When the prawns are completely cooked through serve over salad, rice or noodles sprinkling with fresh coriander if you have some.

Monday 5 November 2012

Meal Planning Monday


Ah, back to school and back to meal planning. This week sees me trying to empty out the freezer a bit, partly because I want to try freezing a scarf which malts everywhere, and apparently sticking it in the freezer will stop it. Having eaten all the things that had been there a little too long a while ago, my freezer seems to be ticking over nicely. The earliest meat thing was bought in July, which is good and not past it's 6 month cut off date. I haven't got as far as the weekend yet! Saturday will be Daring Cooks and Sunday will be someting to use up half a tin of butter beans. I'll think of something!

Monday
Spanish Chicken and Rice Salad (Bento)
Rabbit Burger with Dolcelatte

Tuesday
WW Bacon and Leek Quiche
Out with my Father

Wednesday
Ham and Edamame Noodle Salad
Mexican Lasagne

Thursday
Curried Tuna Salad Sandwich
Going to my Sister's for dinner

Friday
Spicy Sausage and Bean Salad (WW Nice n Spicy)
Scallops with Lemon and Rocket Risotto (Leith's Simple Cookery)

Check out Mrs M for other people's meal plans.

Spanish Bacon and Bean Hotpot

This is like a pimped up version of beans on toast adding bacon, herbs and spices to the mix. I went to the cupboard to get my tin of baked beans to discover that I only had baked beans and pork sausages, in fact I got to point of opening the can, looking inside and discovering sausages before I realised my mistake. I thought what the hell the sausages are in there I'll use them and all was fine. They went nicely with the bacon and the beans and this really is super dooper pimped up baked beans.

This is a really warming and comforting dish, lovely now those cold nights are already here. It freezes really well and has now become one of my freezer staples.


Spanish Bacon and Bean Hotpot (adapted from WeightWatchers Mini Series Weekdays)
(Serves 4)
(10 WW ProPoints per serving)

cooking spray
2 onions, chopped
8 bacon medallions, chopped
2 large garlic cloves, chopped
2 tsp dried mixed herbs
400g can chopped tomatoes
400g baked beans
1 tsp smoked paprika
salt and pepper

Heat a large lidded saucepan and spray with the cooking spray. Add the onions and cook, stirring for 4 mins adding a splash of water if they start to stick. Add the gammon and cook for another 3 mins. Stir in the garlic and cook for a further min.

Add the herbs, tomatoes, beans, paprika and 100ml water and bring to the boil, stirring occasionally. Reduce the heat, season and simmer, half covered for 10 mins until the sauce has thickened slightly. Serve.

Sunday 4 November 2012

Orzo, Feta and Red Pepper Salad

This is a very tasty and quick lunch, all made within about 15 mins. The saltiness of the feta really makes this dish.


Orzo, Feta and Red Pepper Salad (from Good Food Magazine August 2009)
(Serves 4)
(14 WW ProPoints per serving)

1 red onion, peeled, halved and finely sliced
2 tbsp red wine vinegar
3 tbsp olive oil
250g orzo
3 roasted red peppers from a jar, sliced
200g feta cheese, crumbled
2 tbsp pine nuts, toasted
a small bunch mint, leaves chopped

Put the onion in a bowl, season really well and toss with the vinegar and oil. Leave to marinate and soften.

Cook the orzo in salted boiling water until just tender, then drain and rinse under cold water and drain really well again. Toss with the onion and dressing then gently mix through the rest of the ingredients.

Friday 2 November 2012

Ginger Apple Butter

A couple of weekends ago I had a festival of cooking. I made the Feijoada for my Daring Cooks, I made soup, I made muffins and for the first time I made jam. My Mum gave me tonnes of apples of her tree and I was looking for new and exciting things to do with them rather than making more apple compote. I was also looking for a way to preserve them without freezing as I have very limited freezer space and my Mum gave me a recipe for apple butter.

The original recipe is spiced apple butter and calls for ground all spice, ground cloves and ground cinnamon but I went for the ginger variation and it was lovely. It could do with a little more ginger for me but it does have that nice hint of ginger in the background.


Ginger Apple Butter
(Makes 8 and a bit jars)

2.75kg apples
1.2l water
1.2l sweet cider
3 tsp ground ginger
sugar

Wash the apples thoroughly and remove the stalks and bruised parts. Chop the fruit roughly and put into a pan with the water and cider, bring to the boil. Cover and simmer until the apples are soft and pulpy, stirring frequently.

Rub the apple pulp through a fine nylon sieve then weigh it and return to the pan. Allow 350g sugar for each 450g apple pulp and add to the pan with the ginger.

Bring gently to the boil stirring frequently until the sugar has dissolved. Continue boiling stirring occasionally until the mixture thickens and there is no extra liquid in the pan and it looks jam like in consistency. You will probably need to stir and keep more of an eye on the mixture during the last 15 mins or so to stop it from burning.

Put the apple butter into hot clean jars and cover immediately.

Fruit butters will keep for 3-6 months.