Saturday 31 August 2013

Courgette Blossom Linguine

I never really know what to do with the courgette blossoms. I'm terrified of the deep fat fryer still so that's out and I usually just leave them on the plant until they die off. But I thought this year I'd at least find something to do with them so I used them in a pasta sauce. I think I actually used cream cheese instead of creme fraiche but I think creme fraiche would be better as the cream cheese just made everything stick together!


Courgette Blossom Linguine
(Serves 1)

60g linguine
oil
1/2 courgette, grated
3 courgette blossoms, stamen removed and ripped into slices
1-2 tbsp creme fraiche
salt and pepper

Bring a pan of water to the boil and cook the linguine according to packet instructions.

Hear a frying pan with some oil and fry the cougette gently until lightly golden and add in the courgette flowers and fry for a couple of minutes.

Drain the pasta and add to the courgette pan. Add in the creme friache and season. Mix until everything is combined. Serve.

Friday 30 August 2013

Marinated Lamb Steaks with Barley Salad

This was a really delicious salad, with the lamb juicy and tender and the barley salad adding a bit of bite. A lovely summery dish and really worth a go.


Marinated Lamb Steaks with Barley Salad (adapted from Good Food Magazine June 2010)
(Serves 2)

2 tbsp olive oil
2 garlic cloves, finely chopped
pinch dried chilli flakes
small bunch mint, chopped
2 lean lamb leg steaks, trimmed of any fat
100g pearl barley
200g broad beans, fresh or frozen, podded
100g frozen peas
1 small red onion, finely chopped
zest and juice 1 lemon
lettuce leaves
 
Mix together 1 tbsp oil, the garlic, chilli, half the mint and some salt and pepper. Rub all over the steaks, then if you have time, leave to marinate for up to 2 hrs.

Cook the pearl barley in boiling, salted water until tender, but not too soft, about 20 mins, adding the beans and peas for the last 2 mins. Drain really well, then tip into a large bowl. Add the red onion, remaining mint, lemon zest and juice, remaining oil, salt and pepper. Toss everything together.
 
Heat a griddle or frying pan and cook the lamb for 4 mins on each side for pink, or longer if you prefer your meat well done. Divide the lettuce between 2 plates and top with the barley salad. Serve with the grilled lamb, drizzled with any pan juices.

Thursday 29 August 2013

Ham Hock and Cabbage Hash

I've been making more hash! This one used up some cabbage that had been rolling around in the fridge for a while and some ham hock leftover from an earlier recipe. It was really good and the baked beans to go with it are a must. I also had brown sauce with it as a change from ketchup.


Ham Hock and Cabbage Hash (adapted from Good Food Magazine September 2011)
(Serves 5)

1kg potatoes, unpeeled and cut into cubes
25g butter
½ white cabbage, shredded
1 onion, thinly sliced
100ml vegetable stock
175g ham hock, shredded
 
Cook the potatoes in a large pan of water until tender, drain, then allow to steam dry for about 3 mins.
 
Meanwhile, melt half the butter in a large frying pan, then throw in the cabbage and onion and fry for 2 mins. Add the stock and cook for 5 mins more until the veg is starting to soften. Stir in the ham and potatoes and push down in the pan to flatten slightly. Cook for 8 mins until the base is golden and crisp.
 
Heat the grill. Dot the remaining butter on top of the hash, then flash under the grill until golden and crisp. Serve with baked beans and brown sauce or ketchup.

Wednesday 28 August 2013

Duck, Peach and Mango Salad

I don't usually like fruit in salad but as I had all the ingredients to hand I thought I'd give it a go and I have to say I was impressed. This was a lovely warm salad and the fruit really worked with the duck. Lovely and summery.


Duck, Peach and Mango Salad (from Gressingham)
(Serves 2)

2 duck breasts
1 mango, peeled and sliced into chunks
1 avocado, peeled and sliced into chunks
2 peaches, cut into quarters
1 tbsp olive oil
200g mixed leaf
1 lime

Preheat the oven to 180C.

Score the skin of the duck breasts 6-8 times and season both sides with salt and pepper.

Place the breasts skin side down in a cold pan with no oil on a low to medium heat. Cook for approx 6-10 minutes, occasionally pouring off any excess fat. When the skin is crisp and golden, turn breasts over, quickly seal and then place skin side down back in the pan and put into the oven (if your pan is not oven proof, place on a baking tray).

Cook for 6-15 minutes depending on how you prefer your duck cooked.

Remove the duck from the oven, turn breasts over so skin is facing up and allow to rest for 10 minutes in a warm area.
While the duck is resting you can prepare the salad by searing the halved peaches in a hot pan for a minute. Then tumble the lettuce leaves and olive oil in a bowl, and divide between 2 plates .

Evenly distribute the mango, avocado and peach onto the leaves. Thinly slice the duck breast and arrange on top. Finish with a squeeze of fresh lime and serve.

Tuesday 27 August 2013

Salmon, Sorrel and Cream Cheese Parcels

This was delicious. I don't often cook with filo pastry but I think I'm going to have to more often as it's a lovely healthy alternative to puff and tastes just as good.


Salmon, Sorrel and Cream Cheese Parcels (from Lavender and Lovage)
(Serves 4)

4 salmon fillets
2 fresh sorrel leaves
4 tablespoons cream cheese
1/2 red onion, peeled and finely diced
small bunch of fresh chives, finely chopped
juice 1/2 lemon
salt and pepper
8 large sheets of filo pastry
oil
poppy seeds 

Preheat the oven to 200C.

Mix the cream cheese, red onion, chives and lemon juice together, and then season with salt and pepper.

Wrap three sorrel leaves around each salmon, or if they are small, just lay them on top of the salmon. Sit each salmon fillet in the middle of one sheer of filo pastry, and the divide the cream cheese mixture between the salmon, spooning it over the top.

Fold the filo pastry over and the roll to make a tight parcel, tucking in the ends of the pastry as you go; then place the parcels in the middle of the second sheet of filo and roll the salmon once more to make neat parcels.

Brush each parcel with a little oil and place then on a lightly oiled baking tray seam-side-down. Brush a little more oil over the top and scatter some poppy seeds over them, before baking for 20 to 25 minutes, or until the filo is golden brown.

Meal Planning Tuesday

So I'm late but in my defence it was bank holiday yesterday and I spent all day cooking to put things in the freezer. I made pies, tomato sauce and six different things with one cauliflower! My freezer is now full to bursting so I had better get eating! Hope everyone has a lovely week.


Monday
Courgette, Marjoram and Goat's Cheese Quiche with Salad

Tuesday
Smoked Mackerel Pasta Salad (Waitrose Weekend)
Turkish Lamb with Rice and Roasted Cucumber Tzatziki

Wednesday 
Pork Green Enchiladas

Thursday
Courgette Wrapped Fish with Old Bay Seasoning, New Potatoes and Veg

Friday
Salmon Pasta Salad
Duck with Honey, Ginger and Soy with Noodles and Veg


Sunday
Gnocchi with Cherry Tomato Sauce
Seared Scallops with Lemony Farro and Rocket Salad

Monday 26 August 2013

Spinach and Mushroom Stuffed Meatloaf

I have always wanted to make meatloaf but only ever seen recipes that call for combinations of meat rather than just beef or just turkey etc. So when I found one for all beef I knew what I was doing with the last portion of mince in my freezer. This was delicious, lovely and juicy and moist and lots of flavour too. I'm definitely going to have to attempt more meatloaf!


Spinach and Mushroom Stuffed Meatloaf (from Samatha's Suppers)
(Serves 4)

slices bread, crusts removed and diced
1 tbsp milk
500g lean steak mince
salt and pepper
good pinch dried mixed herbs
2 tbsp Worcester sauce (plus 1 extra tsp for glaze)
2 tbsp tomato ketchup (plus 1 extra tbsp for glaze)
1 egg, beaten
1 medium onion, roughly chopped
1 clove garlic
6 mushrooms, thinly sliced
5 balls frozen chopped leaf spinach
1 level tsp mustard powder

In a small bowl mix together the diced bread and milk. Allow to soak for a minutes

Add the mince to a mixing bowl along with seasoning, herbs, Worcester sauce, ketchup and beaten egg.
 
In a food processor or chopper add the bread mixture, onion and garlic. Blitz until fine. Add this to the meat mixture. Using your hands mix and squish the mixture until combined well.

Meanwhile, in a frying pan add a little oil and pan fry the mushrooms for a few minutes, add the spinach and seasoning. Cook gently for 5 minutes. Remove, set aside and cool slightly.
 
In a lightly greased small loaf tin add half the meat mixture. Place the spinach and mushrooms filling on top and spread evenly. Keep a little gap around all sides.

Add the remaining meat mixture on top and level out. Cover with foil and chill until required.


Pre-heat the oven to 150 C / Gas 2. Place the loaf tin (keep foil on) to a baking tray and pour around boiling water to come up approx 3cm. Bake in the oven for 90 minutes.

Meanwhile in a tea cup combine the reserved ketchup, Worcester and mustard powder. Remove meatloaf from the oven. Carefully remove the foil and spread the ketchup mixture along the top. Place back in the oven and cook for another 30 minutes.

Remove from the oven and allow to rest for 5-10 minutes. Turn out onto a chopping board and gently slice into 4 generous portions.

From time to time check the oven to ensure enough water in the baking tray. You may also have to drain some water from the meatloaf itself.

Sunday 25 August 2013

Warm Goat's Cheese Salad

My favourite cheese is and always has been goat's cheese. I love it, soft anyway, I'm not so much a fan of the hard stuff. I make this salad with regularity throughout the summer, with whatever ingredients are on hand. And for me a salad is not a salad without dressing, so pick whatever your favourite combination of oil, vinegar and mustard is and go with it.


Warm Goat's Cheese Salad
(Serves 1)

4-5 rounds goat's cheese
1 small lettuce, separated into leaves
2 slices ham, chopped
2 artichoke hearts in oil, cut into 3
handful black olives, halved
half roasted red pepper, cut into chunks
5 cherry tomatoes, halved
1 portion vinaigrette

Preheat the grill.

Lay the rounds of goat's cheese onto some baking parchment on a baking tray.

Put the salad leaves in a bowl and top with the remaining ingredients except the goat's cheese.

Put the cheese under the grill for about 2-3 mins until golden and bubbling. Place on top of the salad and serve.

Saturday 24 August 2013

Curried Potato and Courgette Pasties

These are a bit like a samosa but using puff instead of filo pastry. They are a bit different especially with the addition of courgette, you can definitely tell it's that time of year again!!


Curried Potato and Courgette Pasties (adapted from Good Food Magazine March 2009)
(Serves 4)

300g potatoes, peeled and cut into small chunks
1 large courgette, sliced then quartered
2 tsp oil
1 onion, sliced
1-2 tsp curry paste
1 tsp black mustard seeds
juice ½ lemon
handful coriander, chopped
375g pack ready-rolled puff pastry
1 egg, beaten
 
Heat a large pan of water, add the potatoes, then cook for 8 mins until just soft. Drain, then set aside.

Meanwhile, heat the oil in a frying pan. Fry the onion and courgette until soft and slightly coloured. Add the curry paste and mustard seeds, then fry for a few more mins until the mixture smells fragrant. Carefully stir in the potatoes, trying not to mash them. Add the lemon juice and coriander, then leave to cool.

Heat oven to 200C.

Unroll the pastry rectangle, place on a floured surface with the long side towards you and roll it out a little more to make it into a square shape. Cut into 4 squares, then cut each one in half so you have 8 long rectangles. Place 4 of them onto a baking sheet, brush the edges with beaten egg and place a quarter of the filling down the centre of each. Top with the remaining pastry, then pinch the edges together to make a sealed parcel.

Brush the pasties with more egg, then bake for 20 mins until puffed and golden. If cooking from frozen, bake for 30 mins. Serve with a green salad and a spoonful of chutney.

Friday 23 August 2013

Crispy Steak and Blue Cheese Wrap

This was a delicious wrap. Using the ingredients you might find in a fajita but with a completely different twist.


Crispy Steak and Blue Cheese Wrap (adapted from Good Food Soups and Salads)
(Serves 1)

1 tbsp oil
1 sirloin steak, cut into strips
1 small red onion, thinly sliced
1/2 red pepper, deseeded and sliced
handful baby spinach
glug balsamic vinegar
25g blue cheese, sliced or crumbled
1 tortilla

Heat the oil in a frying pan, season the steak, then fry with the onion and pepper for about 4 mins. Add in the spinach and stir until it wilts. Add the balsamic vinegar and continue to cook for 1 more min, then remove from the heat.

Warm the tortilla in the microwave. Spoon the beef mixture over the middle of the tortilla, top with the cheese and fold to make a wrap.

Heat the wrap in a dry frying pan on all four sides until crispy and the cheese has melted. Serve.

Thursday 22 August 2013

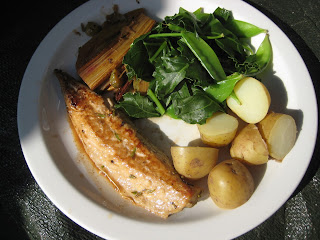
Fresh mackerel with roasted rhubarb

This was an interesting experiment but not one I much enjoyed. However, my rhubarb was a bit old and past it's best so I think that's why it was quite so tart. I might try this again next year using younger rhubarb and see how it goes.


Fresh mackerel with roasted rhubarb (from Nigel Slater's Simple Suppers)
(Serves 2)

4-5 stalks rhubarb good
shake of light brown sugar
2 fresh mackerel, filleted
a little plain flour, seasoned with salt and pepper, for dusting
a couple of good glugs of olive oil
a few sprigs of rosemary, chopped
1 tbsp capers, drained
splash sherry vinegar

For the roasted rhubarb, preheat the oven to 200C. Cut the rhubarb into 15cm/6in or so lengths and place in a roasting tin with half a tea-cup of water and the light brown sugar. Roast until just soft enough to take the point of a knife, about 10-15 minutes. Allow to cool, then drain, reserving the cooking juices.

Dip the skin side of each mackerel fillet into the seasoned flour to lightly coat. Heat the oil in a large frying pan. Gently place the mackerel fillets in the hot pan, skin-side down, and scatter over the rosemary. Add the roasted rhubarb to the side of the pan to heat through and add the capers for a little vinegary flavour.

Turn the mackerel after just two or so minutes when you can see that the mackerel is cooked halfway up the fillet. Cook for a further minute or two, then add the sherry vinegar for richness and allow to just come to the boil in the pan before removing the mackerel and the rhubarb.

To the pan juices, add a little of the juices from the reserved roasted rhubarb to just lift the crispy bits from the pan where all the flavour is. Serve straightaway, with the sauce over the mackerel with the rhubarb on the side.

Wednesday 21 August 2013

Loganberry Ripple Ice Cream

This is the second of the no-churn ice creams I have made this summer and it was utterly delicious. Even better than that peach and ginger one. It s incredibly moreish! I'm so glad I froze some loganberries so I can make more!


Loganberry Ripple Ice Cream (adapted from Tinned Tomatoes)
(Makes 2l)

375g tin condensed milk
600ml double cream
seeds from 1 vanilla pod (or 1 tsp vanilla extract)
300g loganberries
5 tbsp icing sugar

Cook the loganberries and icing sugar gently, until the berries begin to collapse, then remove them from the heat and sieve into a bowl to remove the pips. 

In a large bowl, whisk together the condensed milk, cream and vanilla until it starts to thicken. This takes about 5 minutes with an electric hand whisk. 

Pour some of the loganberry puree into the ice cream mixture and stir only enough to swirl through. 

Pour in a layer of ice cream into a box, then pour over some puree, then another layer of each. Until you have filled your box. Keep a little of the puree to pour on top of the ice cream. 

Pop the ice cream in the freezer to set, preferably overnight. Take out of the freezer about 15-20 minutes before you want to serve it, to let it soften.

Tuesday 20 August 2013

Quinoa with Edamame, Courgette, Parmesan, and Egg

This was a really easy and interesting supper. I loved the textures and flavours of the combination of everything. I added in courgette as I have so many of them, that basically they are being added to everything and anything!


Quinoa with Edamame, Courgette, Parmesan, and Egg (adapted from These Peas Are Hollow) 
(Serves 1)

60g quinoa
75g puy lentils, ready cooked
50g edamame
parmesan
1 large egg
2 tsp oil
salt and pepper
1/2 avocado, peeled, pitted, and cut into chunks

Bring a pan of water to the boil and cook the quinoa according to packet instructions. Adding the lentils and edamame for the last 5 mins. Drain.

Meanwhile, bring a pan of water to the boil for your egg and fry the courgette until brown.

Tip the quinoa, lentils, courgette and edamame into a bowl, toss with one tsp of olive oil and season with salt and pepper. 

Poach your egg until done to your liking. Sprinkle the avocado and cheese over the quinoa and top with the hot poached egg. Serve.

Monday 19 August 2013

Meal Planning Monday

Only a short week for me this week as I am off up to Northumberland for a few days. Then it's back to work after that.


Monday
Chinese Sausage Fried Rice

Tuesday

Wednesday
Quick Croque Monsieur (GF Soups and Salads)

Pasta Alla Genovese

I have been wanting to try this pasta recipe for absolutely ages but somehow never got around to it. It's so simple to make and very filling. Possibly a little too stodgy for me.


Pasta Alla Genovese (adapted from Nigella Kitchen - Nigella Lawson)
(Serves 4)

250g potatoes, peeled and cut into 1.5 in slices quartered into chunks)
250g linguine
100g fine green beans, trimmed and cut in half
2 tbsp pesto

Put the prepared potato chunks into a large saucepan with enough water to take the pasta later, and bring to the boil.

Cook the potatoes until tender, about 20 minutes, then add the pasta and cook according to packet instructions. At about 3 minutes before the end of the cooking time, add the green beans.

Before draining the pasta and potatoes, remove and reserve about ½ cupful of the cooking liquid. Tip the drained potatoes, beans and pasta back into the dry pan.

Add the pesto and enough cooking water to give a runny sauce that coats the strands of pasta as you work it through with a fork or pasta claw. Serve immediately.

Sunday 18 August 2013

Grilled Mackerel Salad with Miso Dressing

This is a yummy and very easy summery salad.


Grilled Mackerel Salad with Miso Dressing (adapted from Delicious Magazine)
(Serves 4)

8  fillets fresh mackerel with skin on
4 tbsp oil
1cm piece ginger, finely shredded
2 garlic cloves, finely sliced
2 red peppers, sliced
4 spring onions, sliced on the diagonal
4 small pak choi, leaves separated and stalks sliced
200g beansprouts
Bunch of red radishes, washed and trimmed but leaves reserved
16 cherry tomatoes, halved
salad leaves
 
For the dressing
3 tbsp mild miso paste (white miso is ideal)
1 tbsp rice or white wine vinegar
1 level tsp wasabi or horseradish
1 tsp sugar or honey
2 tbsp cold-pressed sesame oil

Preheat the oven to 240°C/fan220°C/gas 9. Run your finger along the middle of the mackerel fillets to check for any pin bones. Remove them with tweezers.

Rub the fillets with half the oil and lay, skin-side up, in a single layer on a roasting tray lined with baking paper. Bake the fish for 3-4 mins, or until just cooked through. Set aside to cool.

Heat the remaining oil in a large wok and fry the ginger and garlic briefly until just soft. Add the pepper, spring onions and pak choi stalks and stir-fry for 1 min.

Add the beansprouts and stir-fry for 1 more min. Fold in the pak choi and radish leaves, let them wilt, then remove from the heat.

For the dressing, mix the miso, vinegar, wasabi, sugar or honey and oil in a small bowl. Stir in 100ml water and set aside.

Place the salad leaves into a bowl, top with the stir fried veg, radishes and tomatoes. Remove the skin from the fish and flake into large pieces, place on top of the veg. Drizzle the dressing over the salad and serve.

Saturday 17 August 2013

Millionaire's Shortbread

I've been making lots of ice cream using condensed milk, but only half the tin, which left me with the other half of the tin. The only thing I could think to do with half a tin of condensed milk was caramel and therefore millionaire's shortbread and who doesn't love it?! It was just as good as I remember it being as a child and brought back loads of lovely memories of birthday parties and things growing up.


Millionaire's Shortbread (from BBC Food)
(Makes 20 pieces)
For the shortbread
225g plain flour
175g unsalted butter, cold, cut into cubes
75g caster sugar
 
For the topping
150g butter
1 x 375g can condensed milk
100g golden syrup
350g milk chocolate, chopped into small pieces
Preheat the oven to 150C. Line a 23cm square cake tin with baking parchment.

Combine the flour and butter cubes in a bowl and rub in with your hands until the mixture resembles fine breadcrumbs.

Add in the caster sugar and stir until combined.

Tip the mixture into the tin and spread it out evenly with the back of a spoon. Then press the shortbread down firmly with your knuckles so that it is tightly packed in the tin.

Bake the shortbread for 30 minutes or until very light golden brown. Set aside to cool.

Meanwhile, for the topping, heat the butter, condensed milk and golden syrup in a saucepan, stirring occasionally until the butter is melted and the mixture is smooth.

Increase the heat and bring the mixture to the boil, stirring frequently. The caramel will thicken and turn golden-brown. Set aside to cool slightly, then pour over the cooled shortbread. Allow to cool completely.

Melt the chocolate in a bowl set over a pan of simmering water, stirring occasionally.

Friday 16 August 2013

Chicken Yakitori Kebabs

This is one of my standby meals and I can't believe I've never posted it before. Its really quick to make and if you don't have time for all the marinating, just do it for 20 mins and it'll be fine. I served it with stir fried bean sprouts and pak choi and egg fried rice.


Chicken Yakitori Kebabs (Waitrose Recipe Card)
(Serves 4)

4 tbsp soy sauce
2 tbsp mirin
1 tbsp honey
1 in piece root ginger, peeled and finely grated
1 clove garlic, crushed
400g chicken breast, cut into chunks
4 spring onions, each cut into 3-4 pieces
1 red pepper, deseeded and cut into 1 in pieces

In a large bowl, mix together the soy sauce, mirin, honey, ginger and garlic. Add the chicken and stir well. Cover and leave to marinate in the fridge for 1-2 hours or overnight.

Preheat the grill to high. Thread the chicken, spring onions and pepper pieces alternately, dividing them between 4 metal skewers, reserving the marinade.

Place the kebabs on the grill rack and brush liberally with the marinade. Cook for 10-15 minutes, turning occasionally and basting with the marinade. The chicken should be cooked until the juices run clear and the vegetables should be lightly charred. Serve.

Thursday 15 August 2013

Quinoa, Puy Lentil and Halloumi Salad with Courgette

I have been experimenting with grains over the last few weeks and I finally found some reasonably priced quinoa. I seem to have picked up a back of bulgar mixed with quinoa though so I'm testing the grain out gently! I made this delicious salad using the first of the courgettes from my garden and it was delicious, really filling and wholesome. I felt like I was doing something good for my body!


Quinoa, Puy Lentil and Halloumi Salad with Courgette (from Great British Chefs)
(Serves 4-6)

185g quinoa
430ml vegetable stock (1 cube)
250g ready to eat puy lentils
1 large courgette, sliced diagonally
250g light halloumi
 
For the dressing
3 tbsp olive oil
2 tbsp fresh lemon juice
1 small handful mint
1 small handful basil
1 small handful coriander
pepper
 
Rinse the quinoa thoroughly in a fine mesh sieve. Put the quinoa into a pan with the hot stock and bring to the boil. Simmer for 15 minutes, then leave to sit for a few minutes. Fluff the quinoa up with a fork.
 
Mix the quinoa with the puy lentils in a large bowl. Whizz together all the dressing ingredients and pour over the quinoa and lentils. Mix well.
 
Dry fry the halloumi in a hot pan until golden on both sides. Brush the courgette slices with a little olive oil and cook on a hot griddle pan until lightly charred.
 
Ladle the salad onto a large serving plate and top with slices of halloumi and courgette.

Wednesday 14 August 2013

Daring Cooks August 2013: Lamb Biriani

Grace, one of our talented non-blogging Daring Kitchen members, was our Daring Cooks’ August hostess who shared with us some of her family’s tried and true Bengali Biryani recipes – all of them delicious and all of them prepared fresh from our own kitchens!

I love Indian food and was really excited about this challenge. I made this for my Mum when I went home for a week and instead of using the recipes in the post she found a recipe in her 1969 Cordon Bleu Cookery Course, well I had to try that! Despite some slightly dodgy spelling and the need for damp muslin (we used a damp tea towel instead), the dish was distinctly underwhelming! We did use much less chilli than was in the recipe, as both of us have difficulties with chilli, but I assume that that is where most of the heat comes from, as the dish was only really lightly spicy. It was an interesting experience, especially with the addition of potatoes which made the dish a bit carb heavy! But hey obviously this is 1960s Cordon Bleu's idea of Biriyani.


Lamb Biriani (from Cordon Bleu Cookery Course)
(Serves 6)

2lb leg of lamb
4 green chillies (seeded)
1 clove garlic (crushed with salt)
2-3 sprays coriander or mint, leaves
2 tsp cumin powder
1 tsp chilli powder
1 tsp garam masala
1 carton (5fl oz) plain yoghourt
4 medium-sized onions (thinly sliced)
5 1/2 oz butter
3/4 pint water
1 dsp salt
1lb potatoes (boiled and quartered)
pinch saffron
1/3 pint hot milk
1lb long grain Busmatti or Patna rice
1 1/2oz shredded almonds (unblanched)
2oz sultanas (washed)

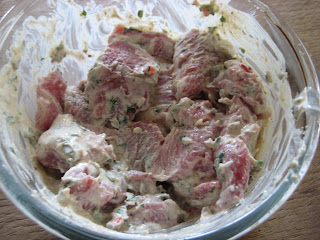
Remove the meat from the bone and cut off some of the fat. Cut the meat into 2-inch squares. Chop chillies very finely, then mix with the garlic, coriander and spices and add the yoghourt. Add the diced meat to yoghourt mixture. Mix well and marinate for 1 hour.


Fry the onions in 4oz butter until brown. Remove from the pan, add the meat to the pan and fry for about 5 mins, turning well so that it does not stick to the pan. Add 3/4 pint water and 1 dessertspoon of salt, cover and cook gently.


When the meat is almost tender (about 45-50 mins), add the potatoes and more salt if necessary.

Leave the saffron to infuse in the hot milk for 10 mins. Boil the rice for 10 mins or until just barely cooked, then drain. When the meat is tender, remove it with its sauce, reduce if necessary, mix with half the onions and a quarter of the rice, moisten with 2-3 tbsp of the saffron milk. Lay this on the bottom of an ovenproof casserole together with the potatoes.


Cover the top with the remaining rice and sprinkle the rest of the saffron milk on top. Cover with a dampened muslin to keep rice moist. Put on a lid and continue cooking in the oven at 350F (180C) for 30 mins.


Meanwhile fry the almonds to a pale gold in the remaining butter, add the sultanas and fry them for a minute longer to plump them.

Serve the biryani with the rest of the onions sprinkled over it and the almonds and sultanas on top.

Tuesday 13 August 2013

Spinach Artichoke Pitta Pizza

I love eating lunch at home, it means I can experiment with warm salads, warm sandwiches and this pitta pizza. I have been looking for pizzas that my Mum can eat as she can't eat tomatoes and this is perfect, not a tomato in sight, it's also super tasty too. It's made all the more easy as it's made on a pitta rather than having to make pizza base. I will definitely be looking out for more pitta pizza recipes.


Spinach Artichoke Pitta Pizza (from Skinny Sometimes)
(Serves 1)

1 wholemeal pitta
1 tbsp low fat soft cheese
1 small handful baby spinach
2 tbsp low fat sour cream
2 artichoke hearts, cut into quarters
small handful grated mozzarella
2 tbsp grated Parmesan cheese
1/2 tsp garlic powder
1/2 tsp Italian seasoning
 
Preheat the oven to 200C.
 
Put the pitta onto a baking tray and spread the soft cheese evenly on the bread. Spread the spinach on top of the bread making a thin layer.
 
Chop the artichoke hearts and put into a bowl. Add the sour cream, mozzarella, Parmesan, garlic powder and Italian seasoning to the bowl and mix.
 
Gently pat the artichoke mixture down on top of the spinach.
 
Bake in the oven for 10-12 minutes until cheese is melted.

Monday 12 August 2013

Meal Planning Monday

Just wanted to share a quick dinner with you:
 
 This is a Thai Yellow Prawn Curry with six different types of veg, most of which came out my garden. It was delicious and I had leftovers which I froze so I can enjoy it all over again at a later date!


Monday
Cold Collation (tomato salad, potato salad, pork pie etc)
Fish Biryani

Tuesday
Sorrel and Samphire Salad
Out at a friends house

Wednesday
Portobello Mushroom Burger with Wasabi Mayo
Toad in the Hole with Veg

Thursday
Cold Collation
Smoked Salmon and Lemon Risotto

Friday
Out with a friend for lunch
Sri Lankan Runner Bean Curry

Saturday
Sorrel Omelette and Salad
Duck with Ginger and Honey with Stir Fried Veg and Noodles

Sunday
Kippers and Crushed New Potatoes (River Cottage Everyday)
Turkey and Courgette Burger with Curly Fries

Peach and Ginger No Churn Ice Cream

It has definitely been the weather for ice cream and I had a hankering for making homemade ice cream but I don't have the space for an ice cream maker nor do I want to be stirring something every hour for hours so I was really happy when I found lots of recipes for no churn ice cream. This peach and ginger ice cream is so good, my only advice is to make sure that your peaches are really ripe as otherwise when they freeze they become ridiculously hard, so hard that I had trouble getting chunks out of the ice cream as the spoon wouldn't go though!


Peach and Ginger No Churn Ice Cream (from Waitrose Magazine July 2013)
(Makes 2 litres)

6 ripe yellow-fleshed peaches
600ml pot double cream
397g condensed milk
12 pieces crystallised ginger, roughly chopped

Place the peaches in a heatproof bowl and pour over boiling water. Leave for 10 minutes then peel off the skins and remove the stones. Roughly chop and set aside.

Whisk the cream with the condensed milk until it has thickened slightly and falls in ribbons from the whisk.

Add the peach chunks and chopped ginger to the whisked cream, stirring gently with a spatula. Pour into a 2-litre plastic container and place in the freezer for 3-4 hours or overnight until frozen. Take out of the freezer approx 15-20 mins before serving.

Sunday 11 August 2013

Halloumi Aubergine Burgers with Harissa Relish

This was a lovey vegetarian 'burger'. I am always on the look out for vegetarian meals that I can easily make and that are quick. This used up the end of a block of halloumi, and the last bit of an aubergine. I loved the hot relish too, it added a lovely spicy element to the dish.


Halloumi Aubergine Burgers with Harissa Relish (from Good Food Magazine June 2012)
(Serves 4)

1 tbsp oil
2 onions, very finely sliced
cooking spray
½ aubergine, cut into 8 round slices
250g block halloumi cheese, cut into 8 slices
1 tbsp soft brown sugar
1 roasted red pepper from a jar, chopped
2 tsp harissa
4 wholemeal rolls, halved and lightly toasted
4 tbsp hummus
 
Heat 1 tbsp of oil in a pan and tip in the onions. Cook over a high heat for a few mins, then turn down the heat and cook until soft and golden, about 8 mins.

Meanwhile, spray the aubergine with cooking spray and heat a griddle pan. Griddle the aubergine for a few mins on each side until tender and slightly charred. Set aside. Griddle the halloumi until golden.
 
Tip the brown sugar, pepper and harissa into the onions. Cook for 1 min until the sugar has melted. While the relish is cooking, spread the rolls with hummus, laying halloumi and aubergine slices on top. Spoon the relish over and serve.

Saturday 10 August 2013

Vegetarian Curried Brown Rice and Broccoli Casserole with Creamy Curry Sauce

This was by far the best rice casserole I have made or tasted so far. It was really easy to make and lovely and spicy and creamy at the same time and it froze well too. This is definitely one I'll repeat. Now to find a recipe that uses cheddar cheese soup!


Vegetarian Curried Brown Rice and Broccoli Casserole with Creamy Curry Sauce
(from Kalyn's Kitchen)
(Serves 8)

400g brown rice
2 large heads broccoli, cut into small florets, stem peeled and chopped
1 medium onion, chopped small
2 tsp oil
1 tsp mild curry powder
1/2 tsp hot curry powder
1/2 tsp salt
150g grated low-fat mozzarella

For the sauce
375ml low fat sour cream
120g light mayo
3 tbsp lemon juice
1 1/2 tsp mild curry powder

Cook the rice according to packet instructions.

When rice is nearly done, Bring a large pot of water to a boil and cook the broccoli for exactly 2 mins then drain..  Preheat oven to 190C.

Heat the olive oil in a frying pan, add the onion, and sauté over medium-high heat until the onion is starting to brown, about 5 mins.   Add the mild and hot curry powder and cook 1-2 mins more.  Add the cooked rice and stir to coat with the oil and curry powder, then cook a couple of minutes to heat the rice.

Spray an 20cm x 20cm casserole dish with cooking spray. Make layers with half the rice mixture, half the broccoli, half the curry sauce, and half the cheese, spreading out to make an even layer with each ingredient.  Make a second layer each of rice mixture, broccoli, curry sauce, and cheese.

Bake the casserole about 30 minutes, or until casserole is starting to bubble and the cheese is lightly browned on top.  Serve with a green salad.

Friday 9 August 2013

Lemon, Olive and Rosemary Chicken with Butter Bean Salad

This was a really flavourful and interested warm salad. I was originally going to eat it cold and then when I looked at the recipe thought it would be better hot and it was incredibly tasty hot. I am really getting into my warm salads now and am hoping this weather holds so I can eat more sat out in my back garden!


Lemon, Olive and Rosemary Chicken with Butter Bean Salad (adapted from Delicious Magazine)
(Serves 4)

grated zest and juice of 1 lemon
1 tbsp fresh rosemary leaves, chopped
3 garlic cloves, chopped
25g pitted mixed olives, chopped
1 tsp golden caster sugar
6 chicken thighs, skinless, boneless
for greasing

For the butter bean salad
2 400g cans butter beans, drained and rinsed
100ml chicken or vegetable stock, hot
250g cherry tomatoes, halved
200g green beans, steamed and halved
2 tsp sun-dried tomato paste
1 tsp white wine vinegar
4 tbsp chopped fresh flat leaf parsley
1 large lettuce, shredded

In a bowl, combine the lemon zest and juice, rosemary, garlic, olives and sugar. Season well and add the chicken. Toss to coat in the marinade, then set aside to marinate for 15 minutes.

Preheat the grill to medium-high. Line the grill pan with foil, lightly grease with oil and add the chicken and its marinade – spread out in the pan. Grill for 15-20 minutes, turning and basting with the marinade as you go, until cooked. Set aside for a few minutes, then thickly slice.

While the chicken is cooking, put the butter beans in a pan with the stock. Simmer gently for 5 minutes, until hot, then drain. Stir in the remaining ingredients and season.

Divide the shredded lettuce between bowls, add the butter bean mixture and top with chicken slices to serve.

Thursday 8 August 2013

Bacon and Greens Sandwich

This is possibly one of the best sandwiches I have ever eaten. I cannot tell you how good it was. The saltiness of the bacon goes perfectly with the slight bitterness of the spring greens to make an amazing sandwich. I ate this after a particularly hard Zumba session because of the heat and it was much needed and much enjoyed.


Bacon and Greens Sandwich (adapted from Nigel Slater)
(Serves 1)

1 sub roll
2 slices smoked bacon
1 large leaf spring greens, sliced
1 clove garlic, sliced

Cut the roll in half.

Heat a small amount of oil in a frying pan and cook the bacon until lovely and crispy. Take out of the pan and set to one side. Toss the garlic into the pan and fry for 30 seconds. Add in the spring greens and fry until wilted.

Layer the bacon on half the roll, top with the garlic and greens and the top half of the roll. Eat!

Wednesday 7 August 2013

Slow Cooker Shredded Beef

I had a small packet of stewing steak in my freezer and I wanted to make two different dishes out of it; One Mexican, one Chinese using shredded beef. All the recipes for making shredded beef that I found contained flavourings for either cuisine, I kept looking and kept looking and finally came across this multi-purpose shredded beef recipe which was exactly what I wanted. It worked perfectly. For the Chinese recipe I sprinkled the cooked beef with some five spice powder, reheated it with some stir fried pak choi and white cabbage, and added some hoi sin sauce, then I wrapped them up in the pancakes using the recipe for the ones for moo shu pork. It was delicious.


Slow Cooker Shredded Beef (adapted from Budget Bytes)
(Serves 8)

1.8kg stewing steak, cut into chunks
500ml beef stock
 
Place the beef into the bottom of the slow cooker. Pour the beef stock over the meat, place the lid on the slow cooker, and cook on high for 4-6 hours, or until the meat is fork tender. The beef should be so tender that it shreds with the slightest pressure of a fork.

Pull the chunks of beef out of the cooking liquid and shred it with two forks. Divide the shredded beef into freezer safe containers (approximately 2 cups of shredded beef per container) and pour some of the cooking juices over top. The juices will help prevent the beef from drying and getting freezer burn while stored in the freezer. Refrigerate the beef until completely cooled before transferring to the freezer.
 
To reheat the beef, simply transfer it from the freezer container to a small pot and heat over medium-low until fully thawed and reheated. Strain the shredded beef from the cooking liquid and season according to the recipe it is being used in.

Tuesday 6 August 2013

Turkey, Barley, Courgette and Mushroom Salad

I have been enjoying some lovely salads over the past few weeks, both hot and cold. This is one where the original recipe if for a hot salad but I actually packed it into a lunchbox and ate it cold. It was really tasty but I would definitely recommend packing the lettuce and the barley mixture separately or not putting both bits together to until the morning if you are going to take this to work otherwise the lettuce tends to get very limp.


Turkey, Barley, Courgette and Mushroom Salad (from Thyme for Cooking)
(Serves 2)

300g turkey breast, cut into strips
1 red onion, sliced
2 cloves garlic, crushed
125g mushrooms, sliced
1 courgette, sliced
4 tsp oil
2 tbsp teriyaki sauce
120g pearl barley
lettuce for 2 large salads

For the peanut vinaigrette
2 tbsp peanut butter
2 tbsp sherry vinegar
2 tbsp olive oil

Bring a pan of water to the boil and cook the barley according to packet instructions until tender.

Meanwhile, heat 3 tsp oil in a large frying pan Add the onion and mushroom and stir-fry until the onion is just tender. Add the garlic and courgette and stir-fry until the courgette just starts to soften. Add 1 tbsp teriyaki sauce and stir well to combine. Remove to a plate.

Add the remaining 1 tsp oil and turkey to the frying pan. Stir-fry until the turkey is cooked through, 4 – 5 mins. Add the remaining 1 tbsp of teriyaki sauce, stir to combine and remove from heat.

Mix together all the vinaigrette ingredients.

Prepare the lettuce and put into large salad bowl. Add the vinaigrette and toss well to combine. Add the barley, vegetables and turkey on top of the lettuce and serve.

Monday 5 August 2013

Meal Planning Monday

This is a mini Menu Planning Monday this week as I am away for a couple of days mid week and my Mum is down as well, which only necessitates planning today and the end of the week. I am trying to use up all the lovely veg I got very cheap and the abundance from my garden. I have so many courgettes it's unbelievable and I'm trying to use them in a variety of ways so I don't get bored! I also got given some lovely beetroot, gooseberries and blackcurrants from my Uncle Stan's allotment and have been merrily eating my way through those too!

I also wanted to share with you a delicious yet simple meal I had last week


Steak, Curly Fries and Roasted Veg. So tasty, yet so simple.


Monday
Curried Courgette and Potato Pasty with Salad
Indonesian Fried Rice with Mackerel

Friday
Bulgar with Balsamic Roasted Veg and Goat's Cheese
Aubergine 'Meatball' Pitta with Crisps

Saturday
Smoked Trout Salad
Gammon in a Honey Mustard Sauce, New Potatoes and Veg

Sunday

Fish Biriyani

Chickpea Flour and Mooli Stir Fry

This year for the first time I have grown both radishes and mooli in the garden. The radishes are easy and delicious in salads, the mooli required a little more searching for recipes, most of the recipes I turned up were Indian and I was especially intrigued by a mooli paratha, but with the first batch I picked I didn't have enough to make paratha but instead went for a dry mooli and greens curry with chickpea flour. Especially as I've had half a bag of chickpea flour sat in my cupboard since Christmas with no real idea of what to do with it! This was perfect, although I have halved the quantity of the flour involved as a lot of it did not cook and tasted a bit grim raw. So make sure that the flour changes colour and goes darker.


Chickpea Flour and Mooli Stir Fry (from Spusht)
(Serves 2-3)

½ cup radish whites, chopped small
3 cups finely chopped radish greens (which are radish leaves, or use spinach)
2 Tbsp oil
1 tsp mustard seeds
tsp asafoetida
½ tsp turmeric powder
½ tsp red chili powder
1/2 tsp ground coriander
1/2 tsp ground cumin
1/4 cup chickpea flour/gram flour
salt to taste

Heat the oil in a pan on medium heat.  When hot, add the mustard seeds and wait for them to pop.  Add the asafoetida and radish whites, sauté for 2 minutes, then cover for 2 mins. Add radish greens and sauté for a minute more.  Cover for 2 more mins, stirring once in to avoid scorching.

Add the turmeric powder, chilli powder, coriander, cumin, chickpea flour and salt.  Mix well so that chickpea flour roasts well in oil to get rid of its raw flavour.  Then cover the pan and cook on low heat for another 2-3 minutes.  Serve as a side dish or with an Indian bread.

Sunday 4 August 2013

Sizzling Sausage Salad

I have been eating a lot of salads recently due to the hot weather. These have usually had a warm element to them, this sausage salad was delicious, I love the warm cherry tomatoes too, they added a lovely sweetness to the dish along with the sweet sausages.


Sizzling Sausage Salad (from Good Food Magazine January 2004)
(Serves 4)

1 tbsp olive oil
400g sausages
1 red onion, roughly chopped
1 heaped tbsp wholegrain mustard
1 tbsp light muscovado sugar
16 cherry tomatoes, halved
2 little gem lettuces, shredded
1 large avocado, peeled and sliced
1 tbsp red wine vinegar
 
Heat the oil in a deep frying pan. Using scissors, snip the sausages into quarters straight into the pan. Throw in the onion, and fry for a minute or two, stirring every now and then to brown everything. Spoon in the mustard and sugar, tip in the tomatoes and cook for a few minutes more, stirring occasionally, until the tomatoes are just beginning to split and the mixture is coated in the sweet mustard glaze.

Meanwhile, arrange the salad ingredients Spoon the hot sausage mixture on top. Add the vinegar and 1 tbsp water to the pan and stir it over the heat to dislodge all those tasty flavourings from the pan. Spoon the pan juices over the salad

Saturday 3 August 2013

Baked Salmon and Eggs

This was a lovely inventive breakfast, a bit of a different way of doing smoked salmon and eggs! My egg was too large and tipped over the side of the roll, so you definitely need a medium egg. I served it with fried mushrooms and salad.


Baked Salmon and Egg (from Good Food Magazine April 2013)
(Serves 1)
 
1 crusty white roll
butter
1 slices smoked salmon
1 medium eggs
a few snipped chives
 
Preheat oven to 180C.

Slice off the top of each roll, then gently remove the bread inside until there is a hole large enough to accommodate a slice of salmon and an egg. Arrange the rolls on a baking sheet, reserving the tops.

Brush the inside and edge of the roll with a little butter, then arrange a slice of salmon inside. Crack an egg into it and season. Bake for 10-15 mins or until the eggs are cooked to your liking. Scatter with snipped chives. Toast the tops, brush with the remaining butter, then cut into soldiers and use to dip into eggs.

Friday 2 August 2013

Tuna Spaetzle Bake

I always wonder what to do with the packet of spaetzle sat in the back of my cupboard. It is like thicker more dense pasta really and as ever pinterest provided the answer! A tuna spaetzle bake which used ingredients right out of the store cupboard. The spaetzle could easily be substituted for pasta and I used a can of tuna mayonnaise with red pepper and sweetcorn which I picked up accidentally thinking it was crab! The tins look the same!  I suspect the mayonnaise made no different at all, just the chunks of tuna were smaller. The addition of sweetcorn was a good one though and gave the dish extra texture.


Tuna Spaetzle Bake (adapted from The Kitchen is My Dance Floor)
(Serves 2)

120g spaetzle
1 can cream of mushroom soup
1 can of tuna 
1 small can sweetcorn
140ml milk
salt and pepper
115g cheddar cheese, grated
handful breadcrumbs
 
Preheat the oven to 180C.
 
Bring a pan of water to the boil and cook the spaetzle according to packet instructions.
 
Meanwhile make the sauce. Combine the mushroom soup, tuna and milk in a pan over a medium heat, season and slowly heat but do not boil.
 
Add the sweetcorn and half the cheddar and stir until it has melted. Add in the noodles and stir until they are thoroughly covered in the sauce.
 
Transfer to an ovenproof dish, sprinkle over the rest of the cheese and the breadcrumbs. Cover the dish with foil and bake in the oven for 15-20 mins. Remove the foil and cook for another 8-10 mins until the cheese is golden and the dish is bubbling. Serve.

Thursday 1 August 2013

Skinny Avocado Egg Salad Wrap

This was a super tasty take on an egg salad without all the gloopy mayonnaise. I would ordinarily mix together yoghurt and mayonnaise anyway to create either egg or potato salads as this gives a much lighter texture but this does away with both making this recipe fairly low in fat and the fat that comes from the avocado is after all healthy fat that we need to keep our bodies running.


Skinny Avocado Egg Salad Wrap
(Serves 1)

1/2 small avocado, sliced
1 hard boiled egg yolk and white chopped separately
2 tsp red wine vinegar
1 tbsp chives, finely chopped
lettuce
tomato
tortilla wrap


In a medium bowl, mash the avocado. Add the egg yolks and mash together.
Add the salt, pepper and red wine vinegar and mix.
Stir in the egg whites and the chives.
Lay a piece of lettuce on the wrap, top with some chopped tomato. Spoon the avocado egg salad into the wrap. Roll it up and serve.