Tuesday, 4 June 2013

Chocolate Covered Flapjacks

I love going to my parent's house not least because I get to see my parents but also it means there are other people to cook for! I love my Mum's kitchen which is twice the size of mine and has an island bit in the middle creating loads more surface space. I am really lucky as she is quite happy for me to do what I want in the kitchen and of course she gets to eat the results! We also do a lot of cooking together now when I go home or when she stays with me, helping each other out to create a dish like the Burmese Chicken Curry we made a few months ago. It's fantastic being able to do that, especially as she is a fantastic ook in her own right and pretty much taught me how to cook. She is always the one I ring up when I want to know something about an ingredient or a food pairing! I feel very lucky to have both my parent's love and support.

I went to my parent's house for the bank holiday weekend and when I got there and I knew I wanted to bake, I had a hankering for something oaty. When I was little I didn't like flapjacks or anything that contained oats, I didn't like the texture. Now, I still don't like the idea of muesli or proper porridge and so stick to ready brek for breakfast, but I do like flapjacks and so that's what I made after a quick shopping trip to pick up some oats and chocolate. As oats are pretty healthy I thought I'd add the chocolate to balance things up a bit! I'd never made them before but they were really easy to make and although they were delicious, they could have done with a bit more ginger.


Chocolate Covered Flapjacks (adapted from Baking Made Easy - Lorraine Pascal)
(Makes 12)

175g butter
150g golden syrup
150g light brown sugar
350g porridge oats
50g raisins or sultanas
½ lemon, finely grated zest
1/2 tsp ground ginger
150g milk chocolate

Preheat the oven to 150C and line a 20cm/8in square baking tin with baking paper.

Melt the butter in a medium pan over a low heat. Dip a brush in the butter and brush the baking tin with a little bit of it. Add the golden syrup and sugar to the butter and heat gently. Once the sugar is dissolved and the butter is melted, remove the pan from the heat and stir in the porridge oats, raisins, lemon zest and ginger.

Pack the mixture into the baking tin and squash down. Bake in the oven for 40 minutes.

Bring half a pan of water to the boil and put a bowl on top, make sure that the bowl isn't touching the water. Break the chocolate into the bowl and stir until it is melted.

Once the flapjacks are cooked, remove from the oven and pour over the chocolate, leave to cool until the chocolate is set, in the fridge is quickest, then turn out onto a chopping board and cut into squares.

Monday, 3 June 2013

Sweet Chilli Chicken Wrap

This is the last of my lunches from before half term. Every Thursday I work until 1.45pm without a lunch break and so I eat my lunch on the tube on my way home. That means it has to be portable and easy to eat. Salads are out as I tend to drop them all over myself, so I tend to stick to a sandwich of some variety. I love wraps, they are a little bit healthier than a traditional sandwich and more versatile and this Sweet Chilli Chicken Wrap is simple but delicious.


Sweet Chilli Chicken Wrap (from a WeightWatchers Magazine Clipping)
(7 WW ProPoints per serving)
(Serves 1)

2 tbsp extra light soft cheese
1 tbsp sweet chilli sauce
1 wrap
lettuce leaves
1 chicken breast, cooked and shredded
1/2 tbsp coriander, chopped

In a small bowl mix together the soft cheese and the chilli sauce.

Heat the wrap in the microwave for 30 seconds to soften it.

Lay the lettuce leaves on top of the wrap, then spread the soft cheese and chilli mixture on top. Lay the chicken on top of that and then sprinkle over the coriander. Roll up and eat or put in a lunchbox.

Meal Planning Monday

It's the first day back after half term today and it is going to be busy busy, as is the week I suspect. I had a lovely week off, I spent the bank holiday weekend at Wimpole Hall on the Saturday and then at my parents, where I did a lot of baking. It was crumbles galore, as well as flap jacks and a loaf of bread. I love being able to feed lots of people as I don't get to do it very often. My whistle stop tour of Paris on Wednesday was fantastic. I went to two exhibitions, both heavily featuring German art, one at the Louvre and the other at the Musee D'Orsay and of course I bought cheese before we left! Then the rest of the week was spent cleaning and tidying the house and gardening, enjoying the sunshine! I also picked my first vegetable of this year, radishes!


It is typical though that the weather turns lovely just as term starts again after a slightly ropey half term week! This week I am trying to use up stuff from the freezer to make extra room as it's my birthday on Saturday! I am doing an kind of Deep South/Tex Mex feast for a few friends. I am hoping to make pulled pork and then curly fries, macaroni cheese, baked beans, coleslaw and salad to go with it, as well as barbecue sauce and apple sauce and then apple and blackberry cobbler for dessert. My Mum is also making homemade buns and a carrot cake. I am so excited but also a little nervous as I have only done pulled pork in a slow cooker before and this is in the oven but I am so looking forward to proper crackling!


Monday
Couscous, Lentil and Hummus Salad
Out at the theatre

Tuesday
Cheese and Onion Quiche and Salad
Chinese Sausage, Noodles and Greens

Wednesday
Chorizo and Hummus Pitta with Crisps
Goose Curry and Rice

Thursday
Smoked Salmon and Egg Wrap with Crisps
Chicken Puttanesca with Mash or Pasta (Sarah Raven)

Friday
Roast Carrot Barley Salad with Balsamic Vinaigrette
Plaice with Prawns and Sea Kale (Philadelphia Cookbook)

As always I am linking up with Mrs M, check out her blog for more meal ideas and I hope everyone has a fantastic week.

Sunday, 2 June 2013

Mushroom, Asparagus and Cambozola Pasta Salad

This pasta salad was a partial mop up of some of the things I had leftover before going away during half term. It started off as a mushroom pasta salad and then the asparagus and cambozola got added in but it works really well as a salad dish. I know I typically always say things are fast and easy to make but that's what I major on especially when making lunches. I don't want to be spending ages making something that's going to be eaten cold the next day, there are too many things to do in the evening as it is. So, I usually make my lunches as dinner is cooking which is why they take no time at all.


Mushroom, Asparagus and Cambozola Pasta Salad
(Serves 1)

60g dried pasta shapes
1 tbsp oil
1 portobello mushroom, halved and sliced
4 asparagus spears, cut into inch lengths
25g cambozola, cut into small chunks
1 tsp pesto

Bring a pan of water to the boil and cook the pasta according to packet instructions adding the asparagus for the last 3-4 mins. Drain and run under cold water. Leave to drain thoroughly.

Meanwhile, heat a frying pan and add a tbsp oil. Fry the mushroom pieces until they are golden, set aside to cool.

Combine the pasta, asparagus, mushrooms and cheese in a bowl and mix in the pesto. Pack into a lunchbox.

Saturday, 1 June 2013

Spiced Salmon with Coriander Mash

This wasn't the most successful dish. As you can see I burnt the salmon, but that is the skin you can see and it was lovely and just undercooked inside. I've added the instruction to turn it over for the last 2-3 mins to the recipe below as I think it would be nice to brown the top as well. t also wasn't all that flavourful. I think I need a spicier curry paste. I used tikka masala paste and even for me, who has problems with chilli, this wasn't hot enough.

I served the dish with aubergines sprinkled with a tsp of garam masala and fried. They were delicious as was the coriander mash. I really should try adding things to my mash more often.


Spiced Salmon with Coriander Mash (adapted from Good Food Magazine November 2003)
(Serves 4)

1kg potatoes, peeled and cut into chunks
2 tsp tikka paste or tandoori paste
200g tub Greek yoghurt
4 salmon fillets
25g low fat spread
1 pack fresh coriander, chopped (a large handful)
4 tbsp or so milk

Boil the potatoes for about 12 minutes until tender. Turn on the grill. Stir the spice paste into 4 tbsp of the yogurt and smear the mixture all over the salmon. Put the salmon in a large heatproof dish, skin side up, and grill for 10 minutes turning over for the last 2-3 mins to brown the top of the salmon.

Drain the potatoes and return to the pan. Add the remaining yogurt with the spread, coriander and milk. Now mash the ingredients together or use an electric hand whisk to beat the mash to a really creamy texture, adding extra milk if necessary.

Pile on plates, serve with the salmon and drizzle with the cooking juices.

Friday, 31 May 2013

Angel Hair Salad with Sausage, Tomatoes, Olives and Basil Vinaigrette

I love the idea of a spaghetti salad. I wasn't sure how it would work or if it would be too messy to eat but luckily the recipe called for it to be broken up. This had fantastic flavour with all the basil added to it. It would be even better in the summer with proper home grown tomatoes but it was very good as it was.


Angel Hair Salad with Sausage, Tomatoes, Olives, and Basil Vinaigrette
(adapted from Kalyn's Kitchen)
(Serves 1)

2 sausages (I used pork and caramelised onion)
60g angel hair pasta, broken into pieces about 2 inches long
10 cherry tomatoes, quartered
8 olives, halved
1 spring onion, chopped
1 tbsp parsley chopped
1 tbsp Parmesan, grated
salt and pepper

For the dressing
1/2 tbsp white balsamic vinegar (or white wine vinegar would work)
1 tsp red wine vinegar
1/2 tsp dried Italian Herb Blend
1/2 tsp garlic powder
1 1/2 tbsp extra-virgin olive oil
5-6 fresh basil leaves, finely chopped

Preheat the oven to 200C.

Put the sausages on a baking sheet and bake in the oven for 25-30 mins until browned. Leave to cool.

Meanwhile, bring a pan of water to the boil and add the pasta, cook until al dente about 3 mins. Drain the pasta and run under cold water.

Cut the cooled sausage into thick slices, add a little more olive oil to the frying pan, and brown the sausage slices again on both sides.  Set aside on kitchen roll to cool.

Whisk together the white balsamic vinegar, red wine vinegar, Italian herb blend, garlic powder, and olive oil to make the dressing, then whisk or blend in the finely chopped basil (or basil pesto.)
Put the cooled and drained spaghetti, sliced tomatoes, and sliced olives into a large bowl and gently toss with the dressing. Add the cooled and browned sausage slices and toss again, then add the chopped parsley, sliced green onion, and coarsely grated fresh Parmesan and toss again. Season the salad well and serve or pack into your lunchbox.

Thursday, 30 May 2013

Ham, Pea and Mint Pasties

These pasties are so good, I cannot tell you how tasty they are! Well I can try, that, surely, is partly the point of a food blog! Just the combination of all the ingredients works so well together and I even thought the shortcrust pastry was probably better than puff pastry would have been and I love puff pastry! I made a batch of these a few weeks ago and froze them and this is the first one I've tried. I used shredded ham hock as I couldn't find any thickly sliced ham, not even the deli counter had anything other than honey roast ham which I hate. I will definitely be making them again. I served it with a lovely green salad, using lettuce from my Mum's garden.


Ham Pea and Mint Pasties (adapted from Good Food Magazine May 2010
(Serves 2)

1/2 sheet ready rolled light shortcrust pastry
25g low fat spread
1/2 onion, finely chopped
100g peas, frozen or cooked fresh
50g thickly sliced ham, chopped into small chunks
small bunch mint, leaves picked and finely chopped
125g pack ricotta

Melt the butter in a frying pan. Add the onion and gently sweat for 10-15 mins until really soft, but not very coloured. Stir in the peas for 1 min, then turn off the heat and stir in the ham, mint and ricotta with plenty of seasoning.

Preheat the oven to 180C and divide the pastry into 2 equal pieces. Brush the edges with a little of the beaten egg, spoon half the filling on half of the pastry, then bring over the opposite side of the pastry and seal. Crimp to make a pasty shape. Carefully lift onto a baking sheet. Brush the finished pasties all over with egg. Bake for 30-40 mins until golden and crisp. Leave to cool slightly, then serve either warm or cold.

Wednesday, 29 May 2013

Miso Prawns with Veggie Rice Salad

Today I am off on a jolly to Paris! I'm going with my father to two exhibitions and we are also going out for lunch, I'm so excited! It's ages since I've been to Paris.

This is a really simple but flavourful rice salad. It's nice with the prawns served hot or cold. I had them cold as I took it to work in a lunchbox but I've had them hot too and both were really tasty.


Miso Prawns with Veggie Rice Salad (from Good Food Magazine August 2012)
(Serves 4)

200g brown basmati rice
175g asparagus tips, cut into inch chunks
200g frozen edamame
1½ tbsp sesame oil
4 spring onions, finely sliced
large handful coriander, roughly chopped
1 green chilli, finely diced

For the prawns
400g raw large peeled prawns
3 tbsp sweet miso paste
2 tsp soy sauce
2 tsp Japanese rice vinegar
2 tsp soft brown sugar
black pepper

Bring a pan of water to the boil, add the rice and cook according to packet instructions. Add the edamame to the rice for the final 5 mins and the asparagus for the final 3 mins of cooking. Rinse under cold water, draining thoroughly.

Toss the rice with the sesame oil and mix in a large bowl with the spring onions, coriander, chilli and seasoning.

Heat the grill. Place the prawns in a bowl with the miso, soy sauce, rice vinegar, sugar and pepper. Give everything a good stir, making sure the prawns are well coated. Thread prawns onto skewers and lay on a grill pan. Grill for a couple of mins each side, turning, until prawns are cooked through.

Serve with the rice salad and drizzle over any of the cooking juices.

Tuesday, 28 May 2013

Pear and Honey Muffins

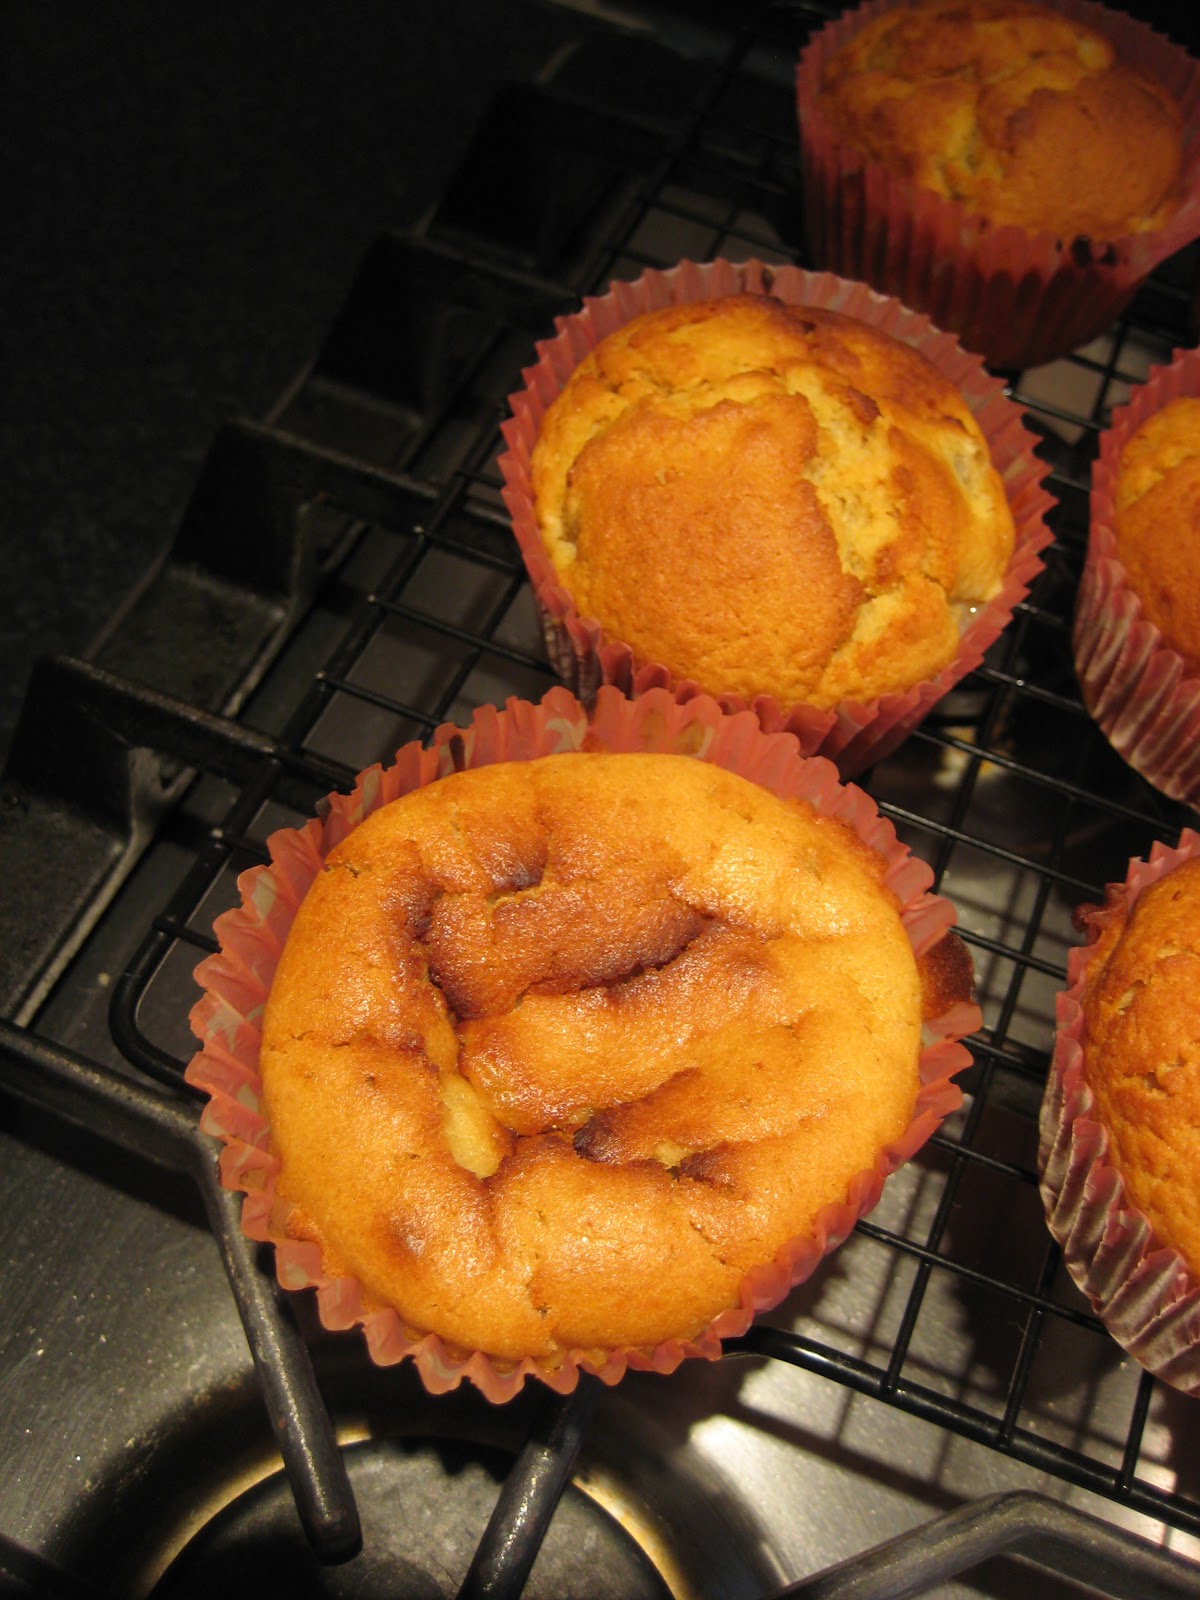
I had all sorts of issues with these muffins. I made them last weekend, making the first batch on Saturday morning using plain flour. Which came out of the oven looking fine:


They hadn't risen much but weren't a disaster. I left them on the side to cool and when I came back they had sunk, and when tasted didn't quite taste cooked in the middle. I was meant to be taking them to a party the following day and well I couldn't.

So I made a new batch the following morning using self raising flour and this was the result when cooled:


Much more risen and much better looking cakes! The two muffins below are a comparison, the top one is the second batch using self-raising flour, the bottom is the first batch using plain flour.


So I think the answer is use self raising flour when using American recipes to bake. Is there some kind of raising agent in all-purpose flour, which is what the original recipe called for? Is that why mine made with plain flour failed?

Pear and Honey Muffins (adapted from Crepes of Wrath)
(Makes 12-16 muffins)

275g self-raising flour
¾ tsp baking soda
½ tsp salt
170g unsalted butter, cubed
200ml honey
3 eggs, room temperature
½ tsp vanilla extract
1 pear, peeled, cored and mashed
1 pear, peeled, cored and diced
 
Preheat the oven to 180C. Line the muffin tins with paper cases.
 
Combine the flour, baking soda, and salt. In a mixing bowl, beat the butter until smooth and creamy, about 3 mins, then add in the honey and beat until combined. Add in the eggs, one at a time, until combined , then add in your vanilla and mashed pear.
 
Gradually fold in the flour mixture, then fold in the diced pear. Divide the batter amongst your paper cases.  Bake for 18-20 mins. Allow to cool before removing from the tins.

Monday, 27 May 2013

Merguez Sausage Couscous Salad

A wonderfully tasty couscous salad, which would be fantastic made with giant or Israeli couscous instead. I made this fantastic Israeli couscous dish a couple of weeks ago and thought that it would make a fantastic salad. I changed a few things, added in some olives and some seasoning as well as the sausages, I also used normal couscous instead of the giant stuff, either works, and it was delicious, lovely with the spiciness of the sausages.


Merguez Sausage Couscous Salad
(Serves 1)

1/4 red onion, diced
1/4 fennel bulb, diced
1/4 aubergine, diced
1/2 red pepper, diced
1 garlic clove, skin left on
cooking spray
1/2 tsp cumin seeds
1/2 tsp ras-el-hanout
5 cherry tomatoes, halved
2 merguez sausages
75g dried couscous
6-8 olives, halved
1 tsp parsley, chopped
1/2-1 tsp harissa
1/4 preserved lemon, rind only, chopped
squeeze lemon juice

Preheat the oven to 180C

On a baking tray spread out the onion, fennel, aubergine, red pepper and garlic clove, spray with cooking spray and mix until well coated. Sprinkle over the cumin and ras-el-hanout. Cook in the oven for 30 mins stirring  at 15 mins and adding the cherry tomatoes.

Cook the merguez sausage in the oven for 20-30 mins until cooked through.

Prepare the couscous according to packet instructions, usually putting into a bowl, pouring over boiling water and leaving to stand for 5 mins. Fluff with a fork.

Add the olives, parsley, harissa, preserved lemon and lemon juice to the couscous and mix.

When the merguez are cooked, cut into 2cm/1in chunks and add to the couscous.

When the roasted veg are done, carefully remove the garlic clove. Add the veg to the couscous. Squeeze the garlic out of it's skin into the couscous mixture and stir to combine. Pack into your lunch box and leave to cool. Refrigerate overnight and your lunch is ready for the following day.